Lola Transverse Indy/ChampCar Gear Change
Lola began using a transverse gearbox in 1994. They followed the same
basic format from 1994 through 1999. The following is a step by step
pictorial depiction showing the removal of all six forward speeds and reverse in
a 1999 Lola ChampCar.
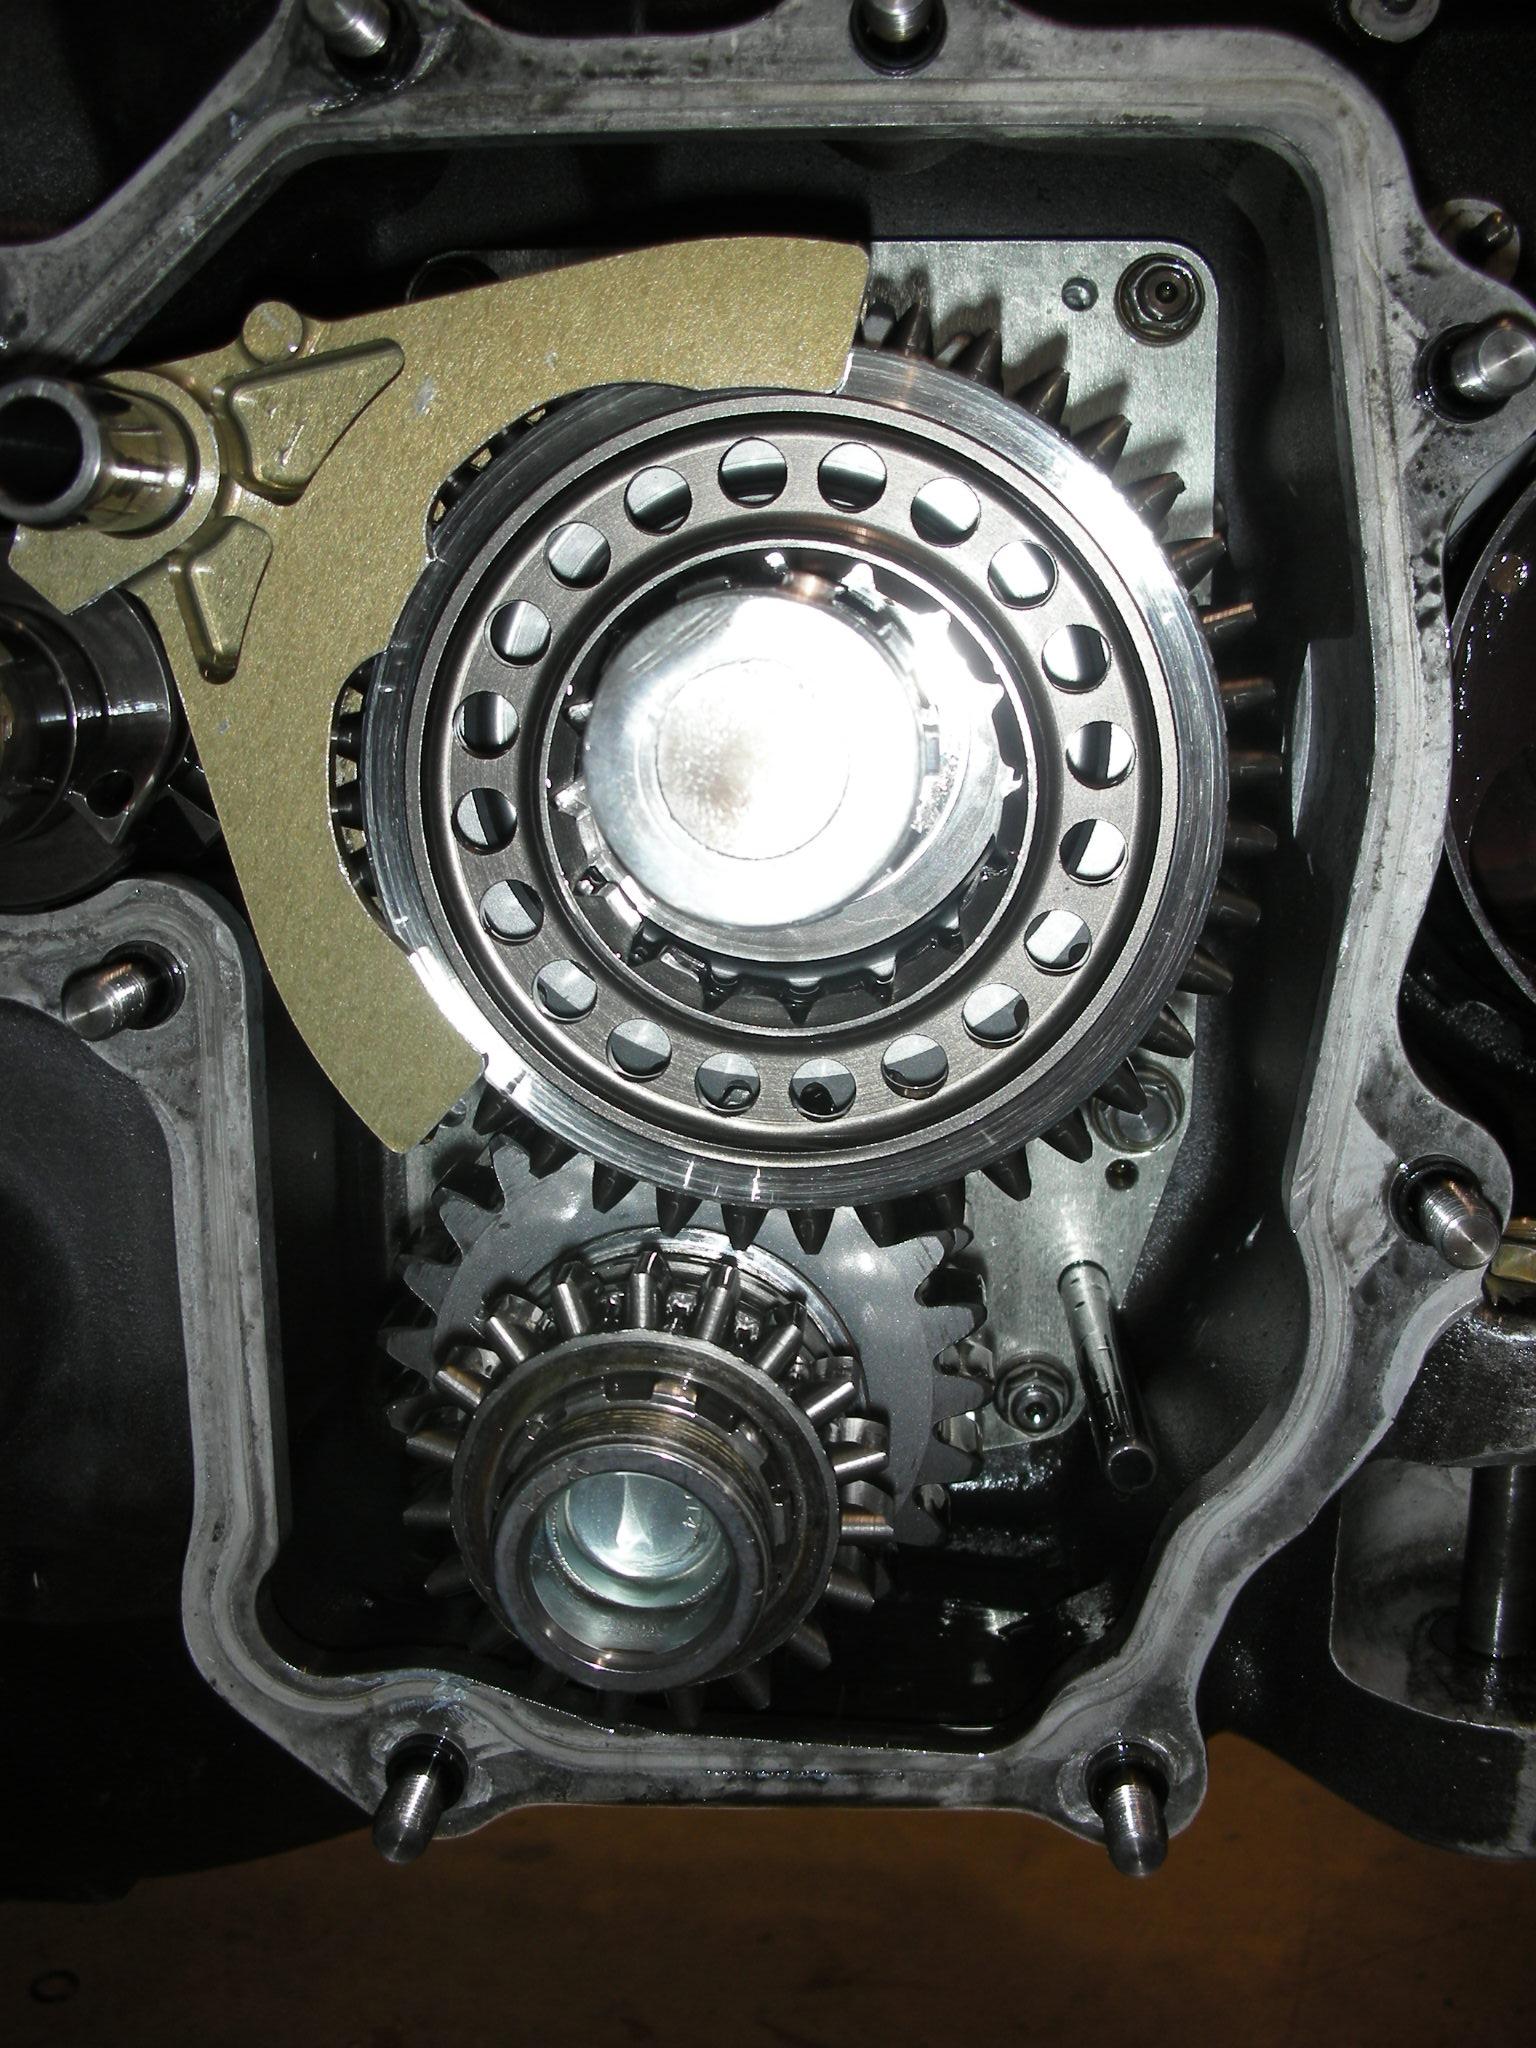
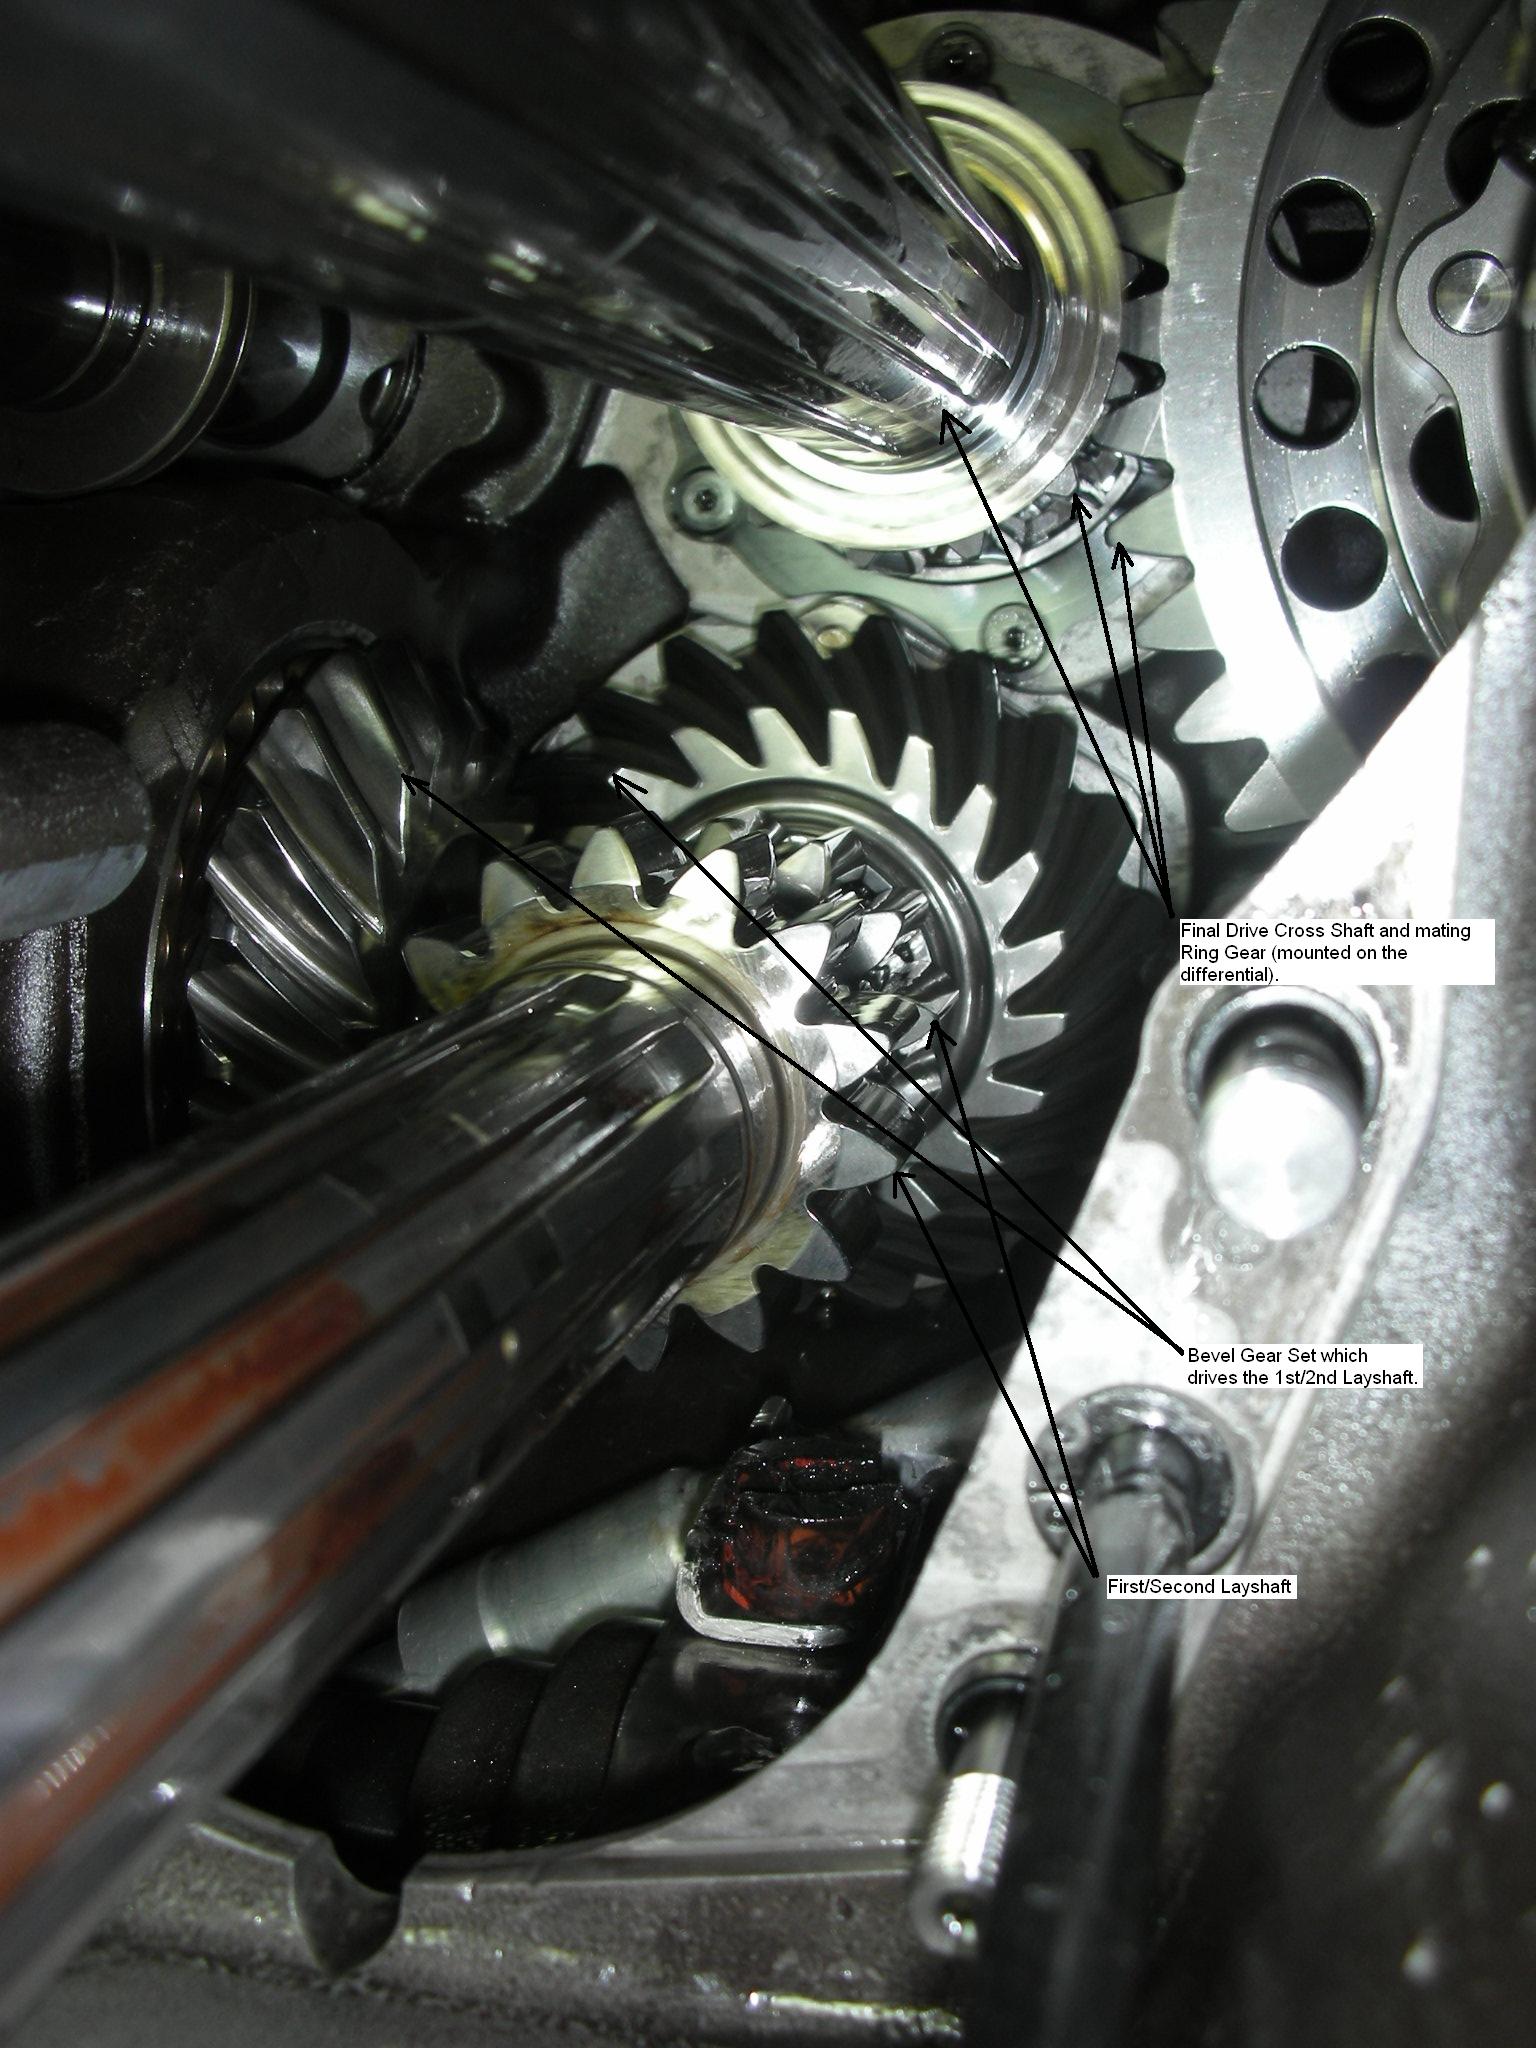
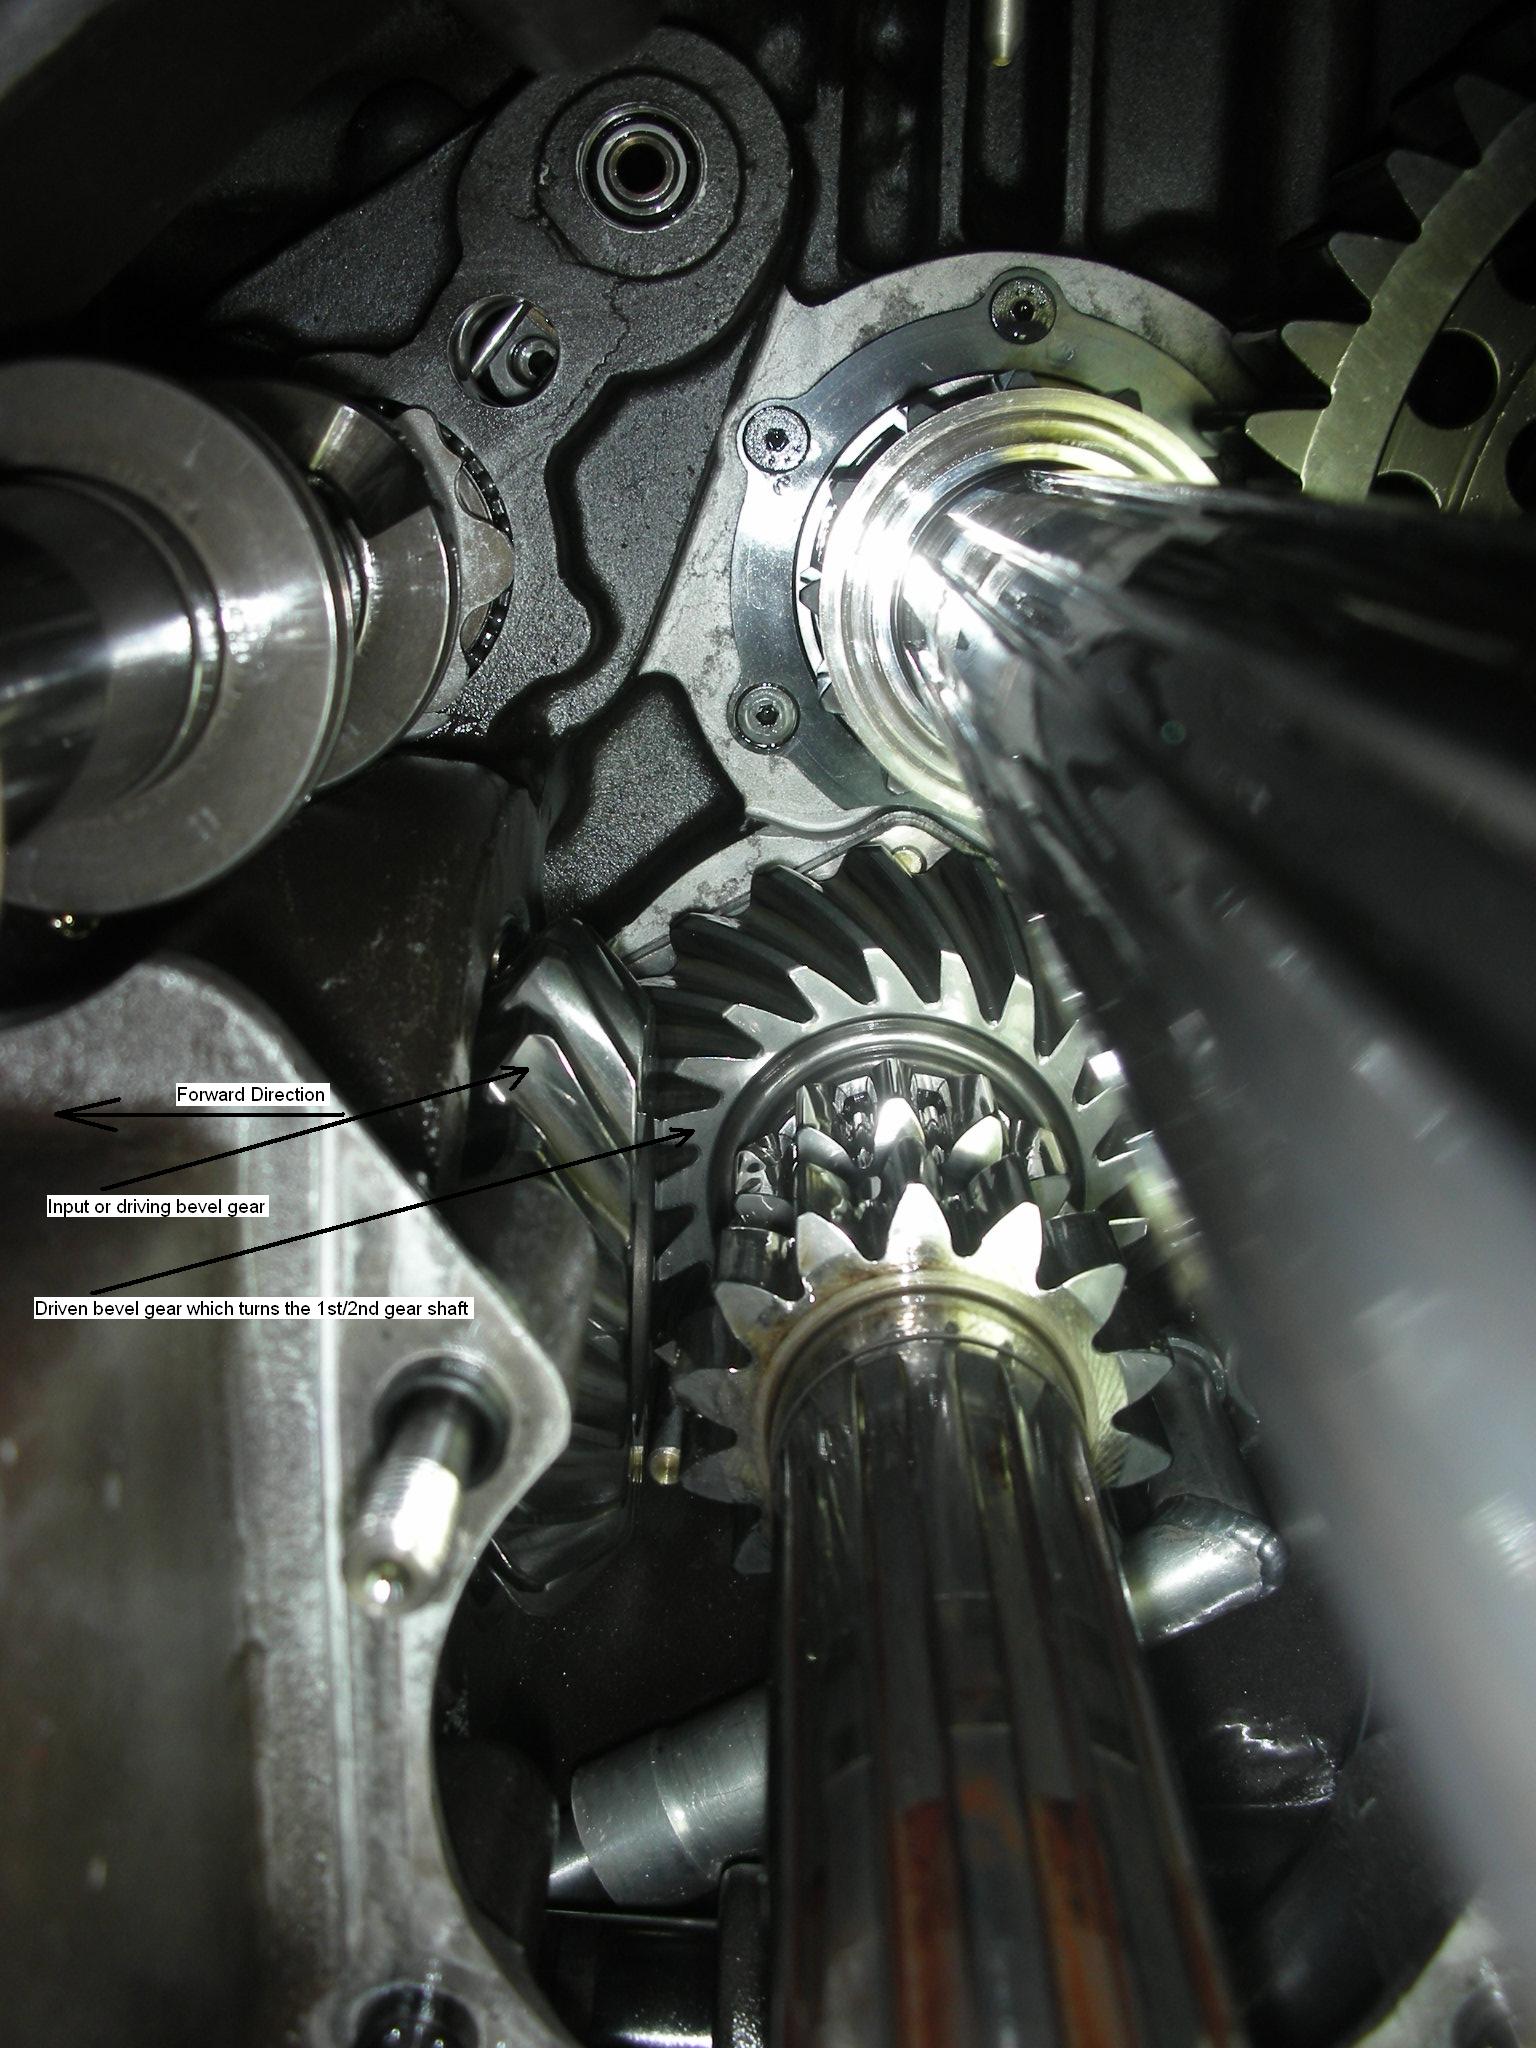
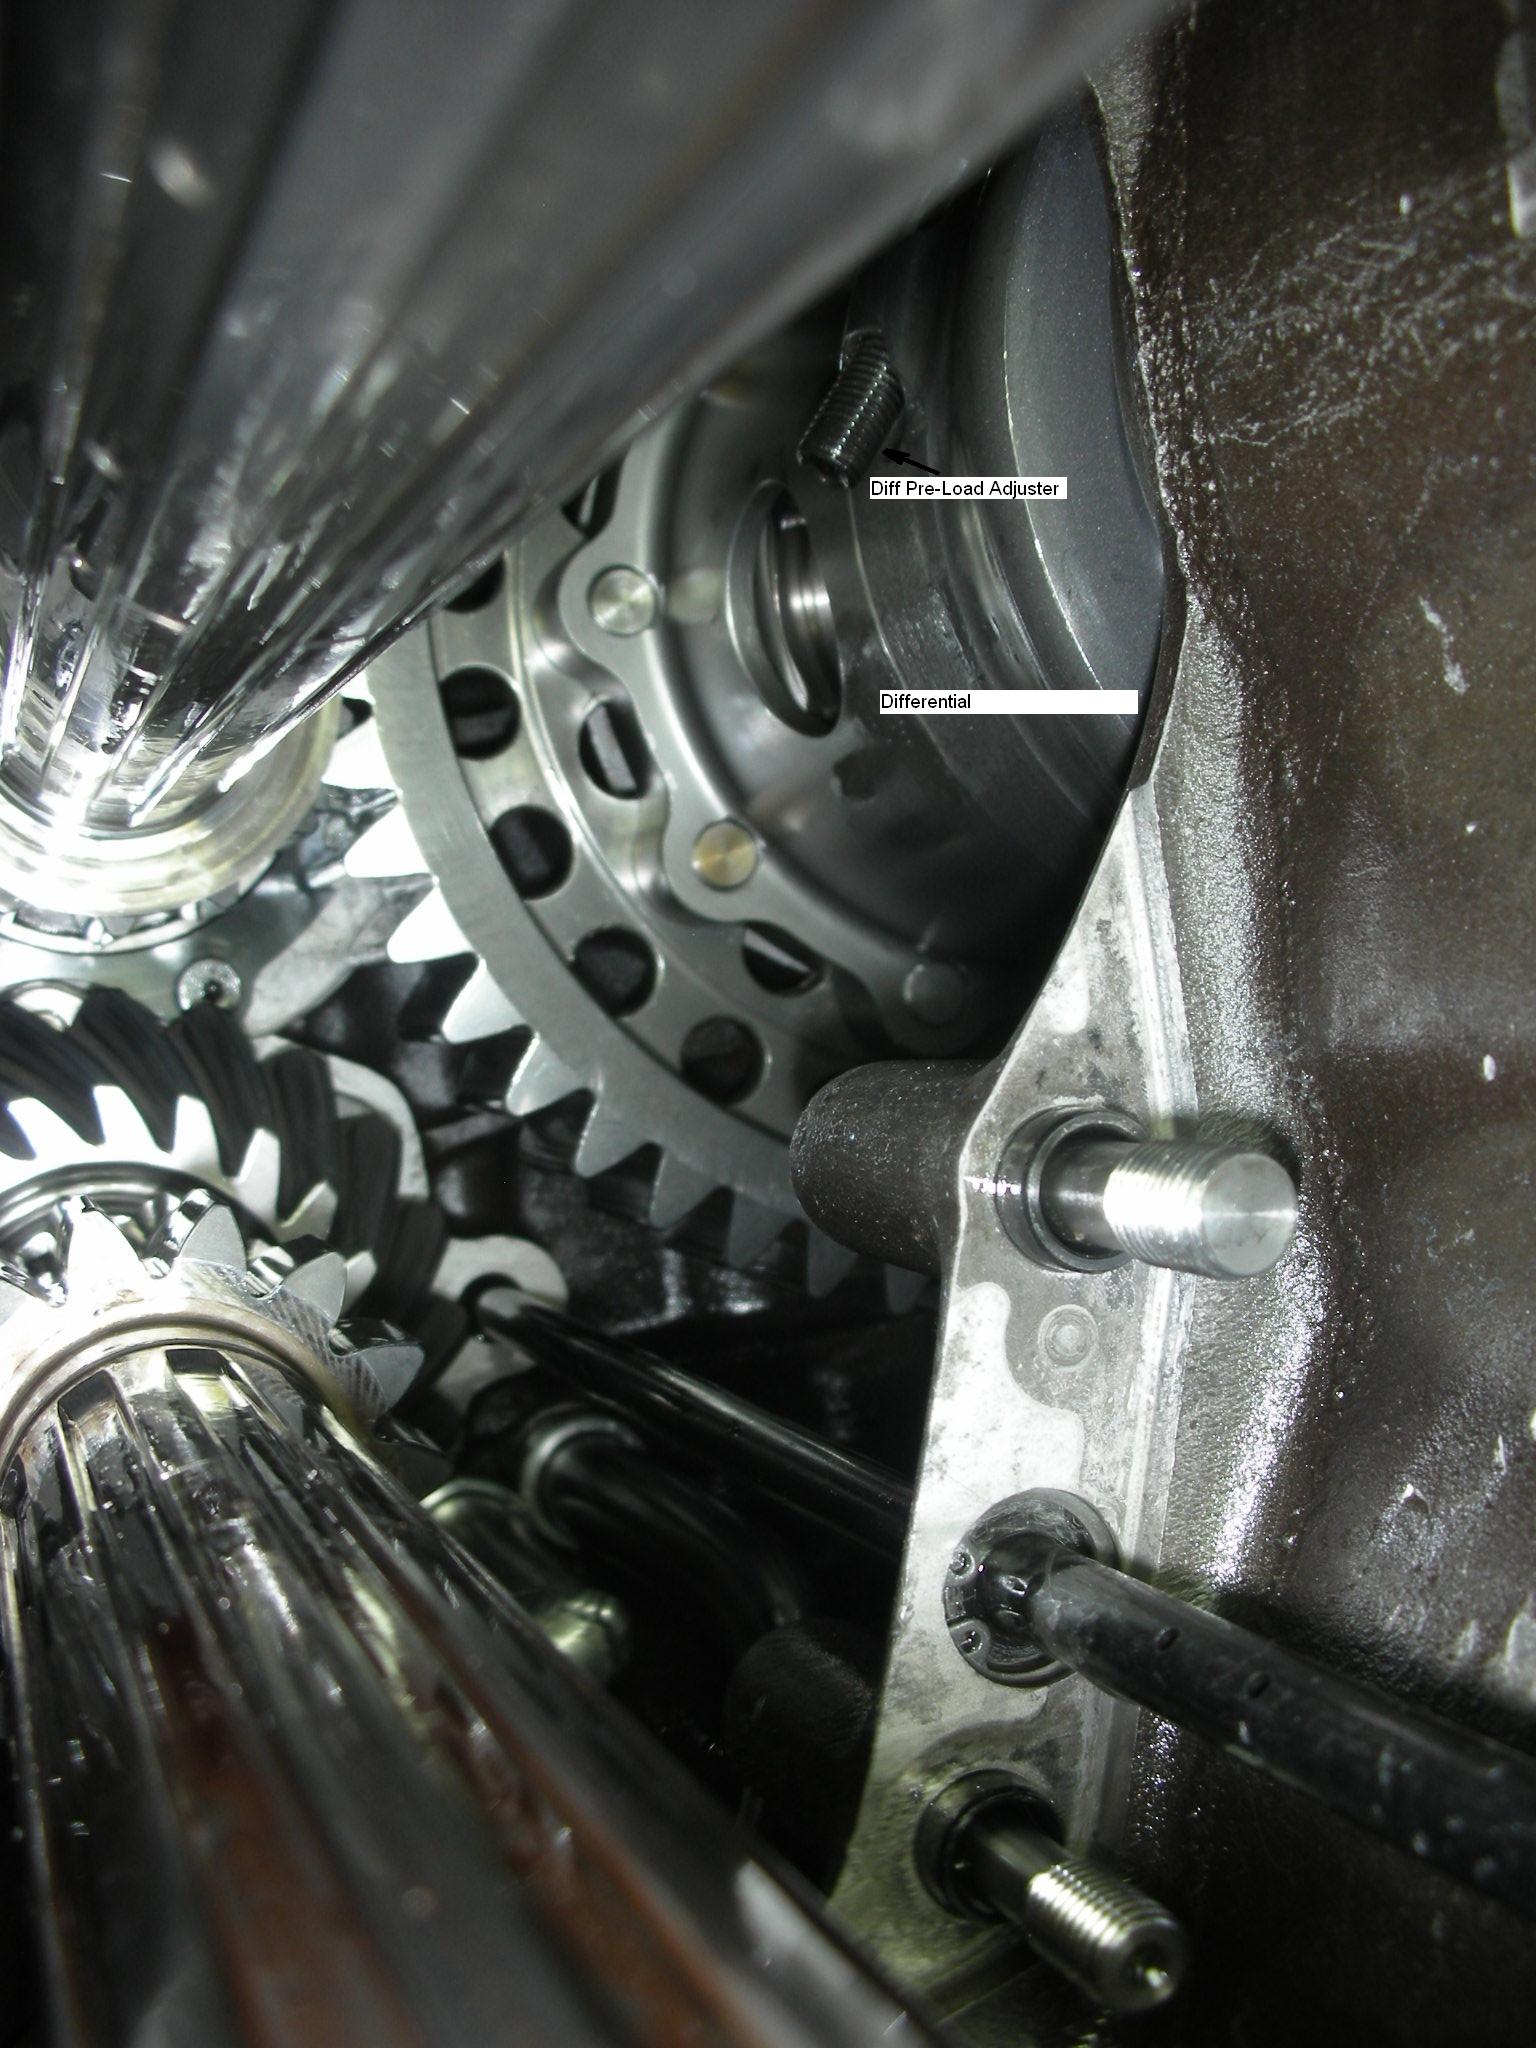
Keep in mind while viewing the pictures that power comes in via an input
shaft, travels through a set of drop gears which turn a set of bevel gears.
You will see the bevel gears in some of the following pictures. The output
of the drop gear set (not shown) is attached to the "driving" bevel gear shown
below. The "driven" bevel gear then turns the 1st/2nd layshaft which turns
the output shaft via whichever gear is selected. The end of the output
shaft has a spur gear which directly drives the ring gear mounted to the
differential.
The disassembly process goes in this order-
Drop the underwing and remove the turbo exhaust elbow and exhaust diffuser.
The left rear suspension has been removed in the following pictures to
facilitate photography but this is not required nor is it normally done when
servicing the gearbox.
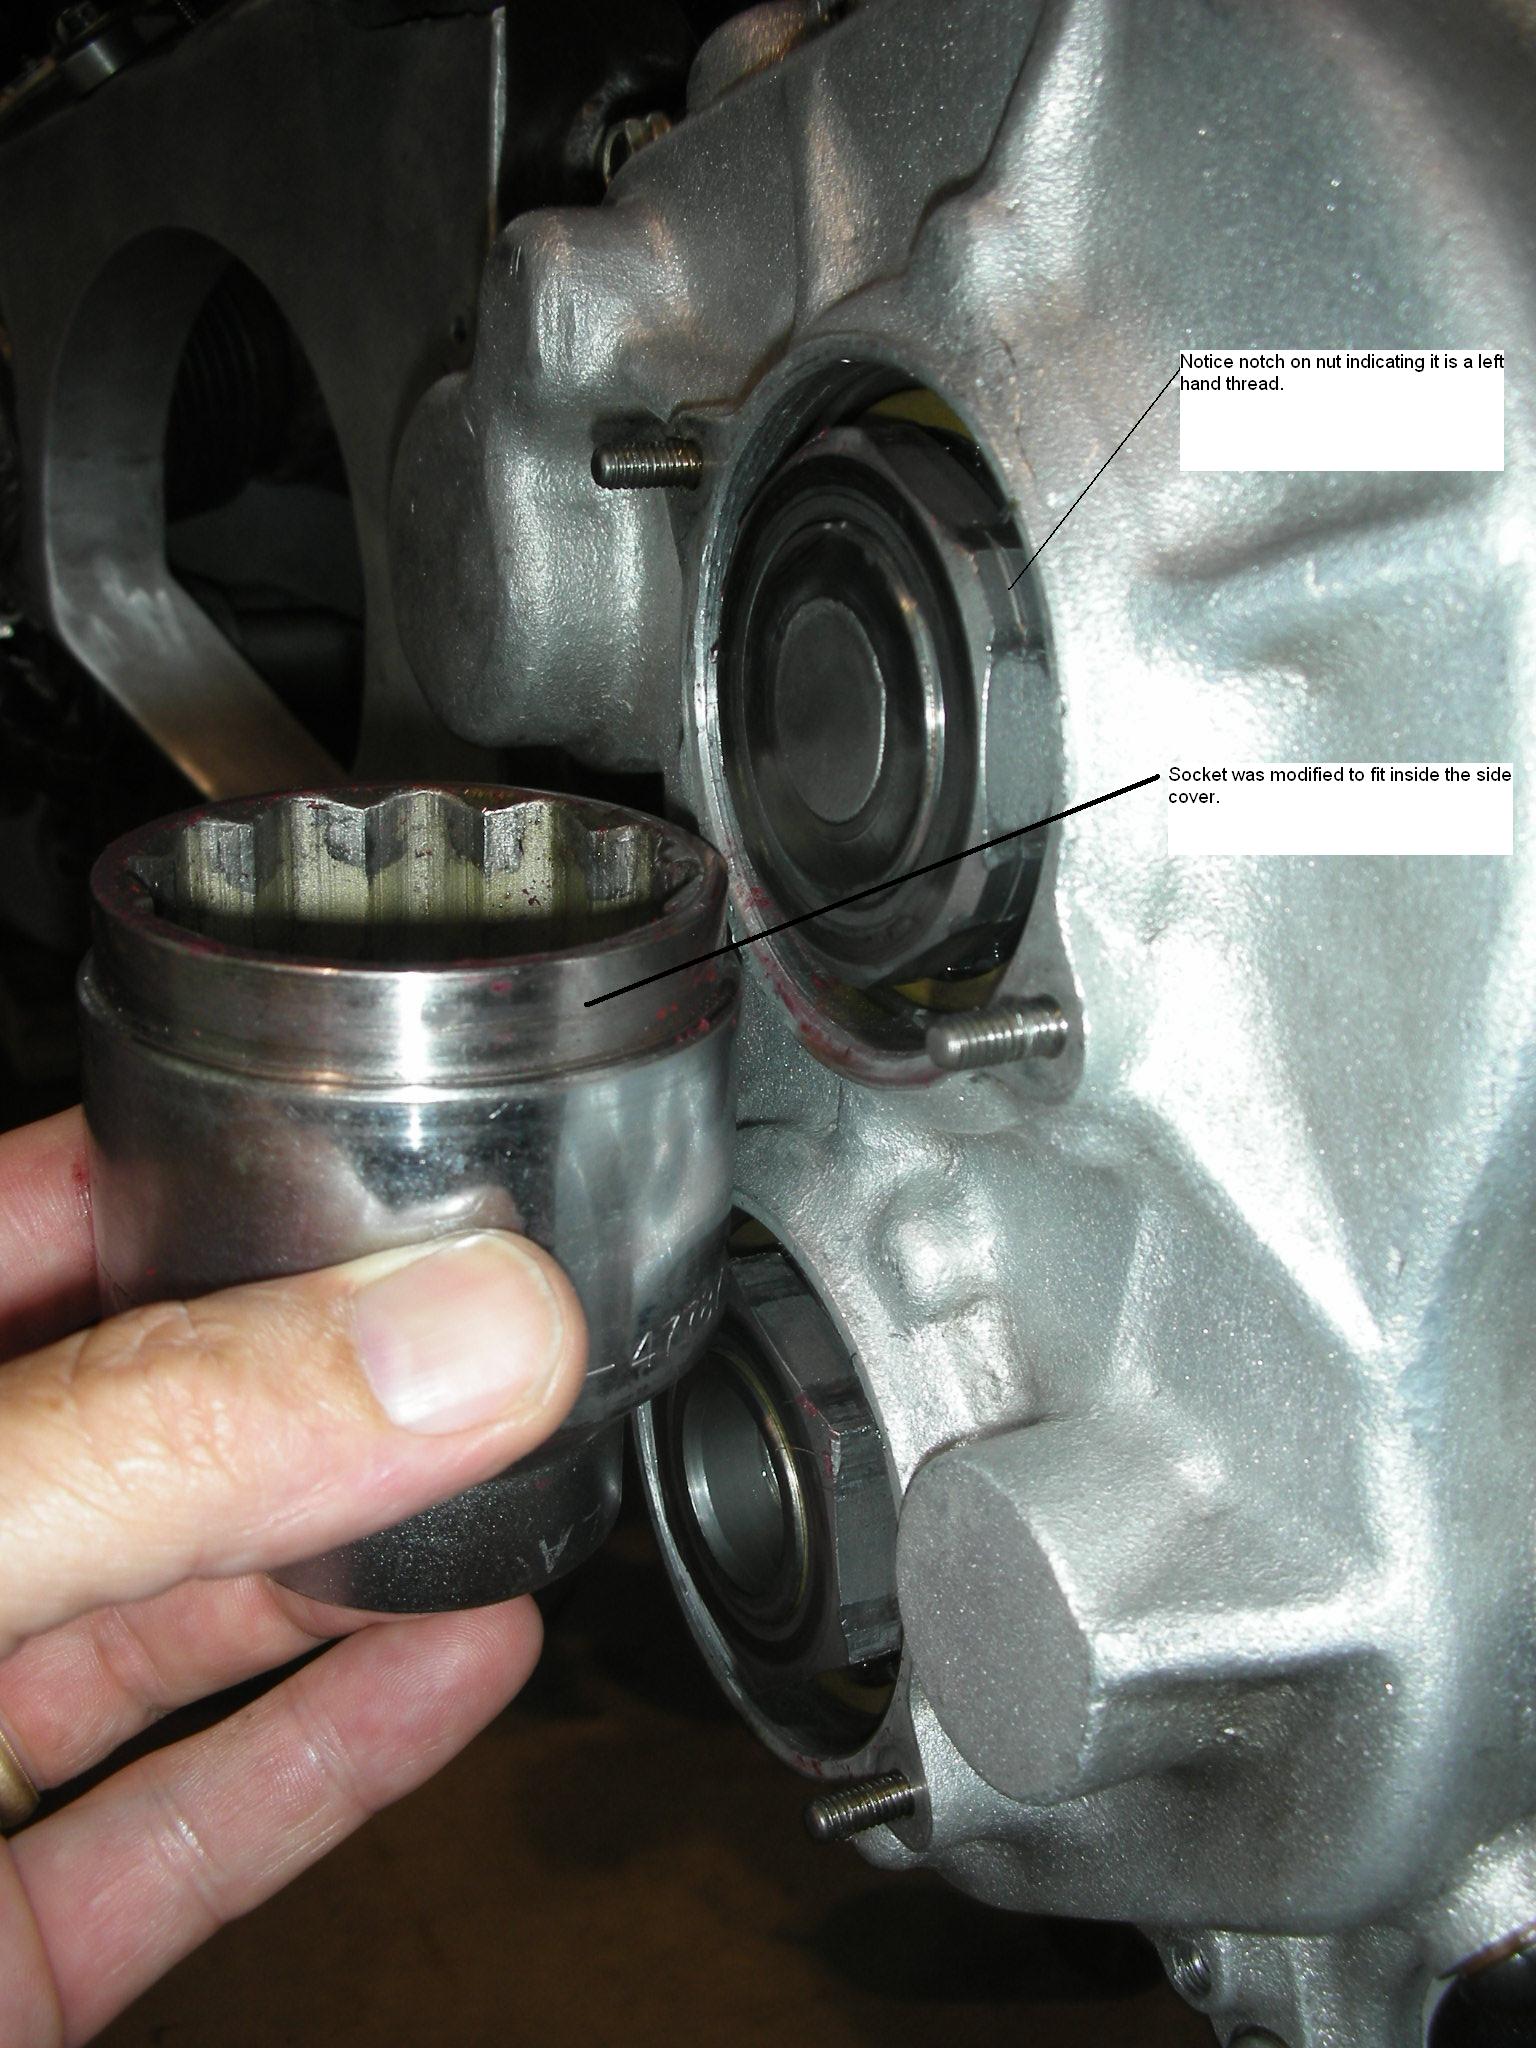
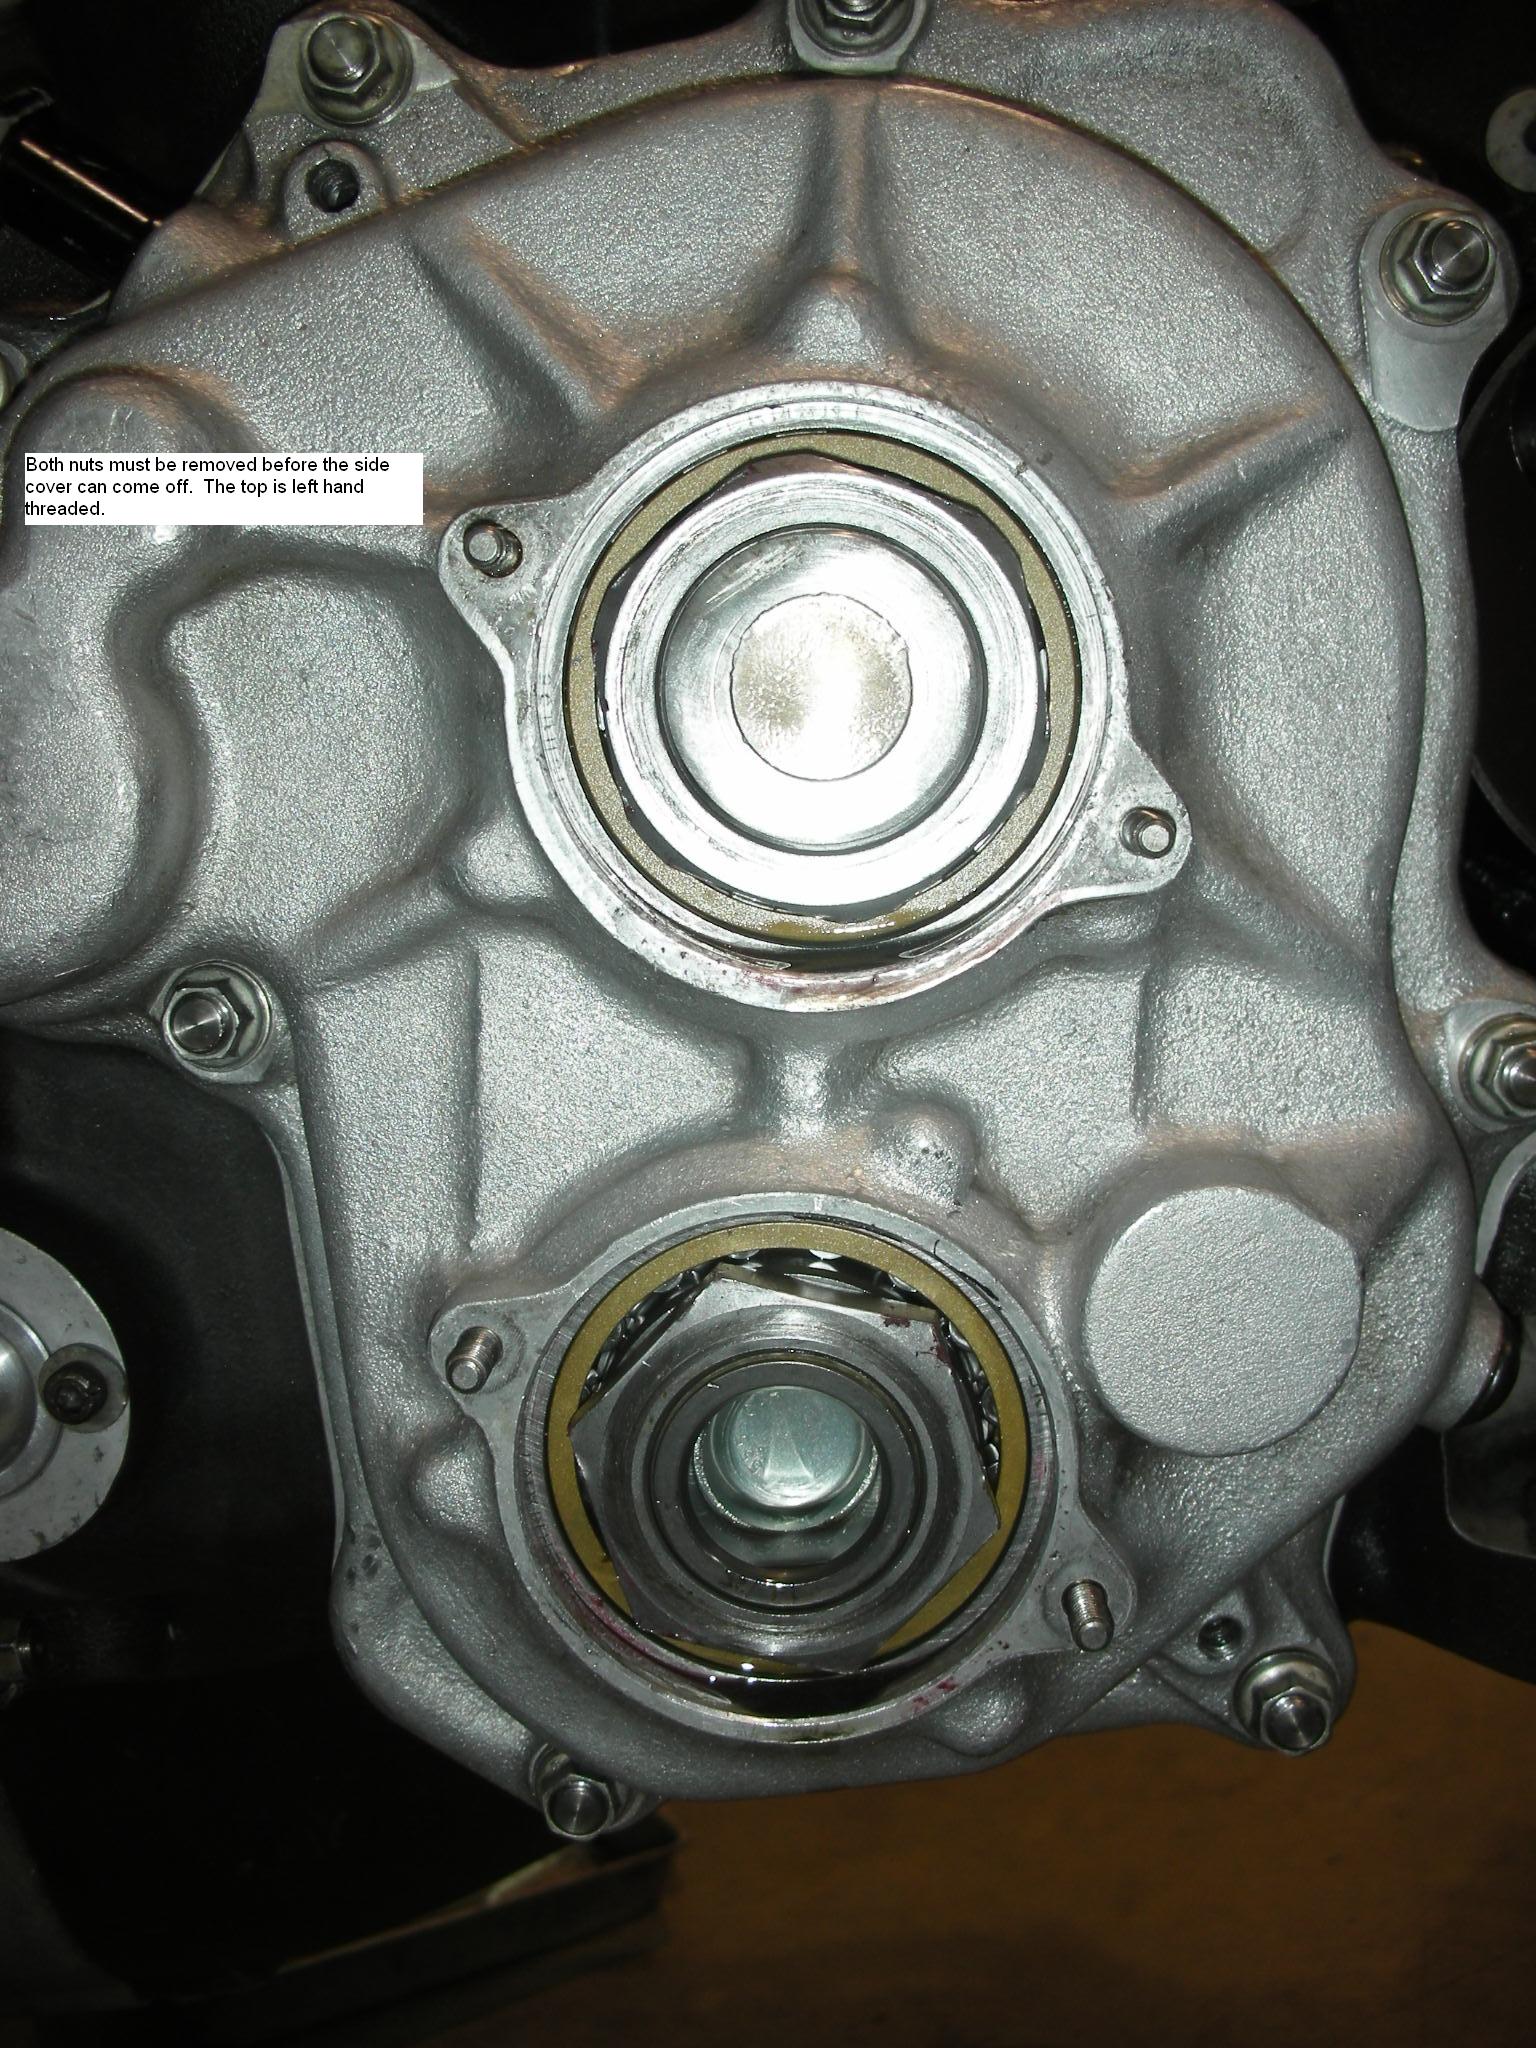
Remove the two layshaft access covers and remove both the left hand threaded
top layshaft nut and the right hand threaded bottom layshaft nut. The left
hand threaded nut will have a groove cut in the outer portion of the nut to
indicate that it is a left hand threaded part. Note that the 1 7/8 inch
socket needed for the top left hand threaded nut will normally need modification
to fit between the nut and the gearbox side cover. The 1 3/4 inch lower
right hand threaded socket used on the lower layshaft should work just fine as
you buy it.
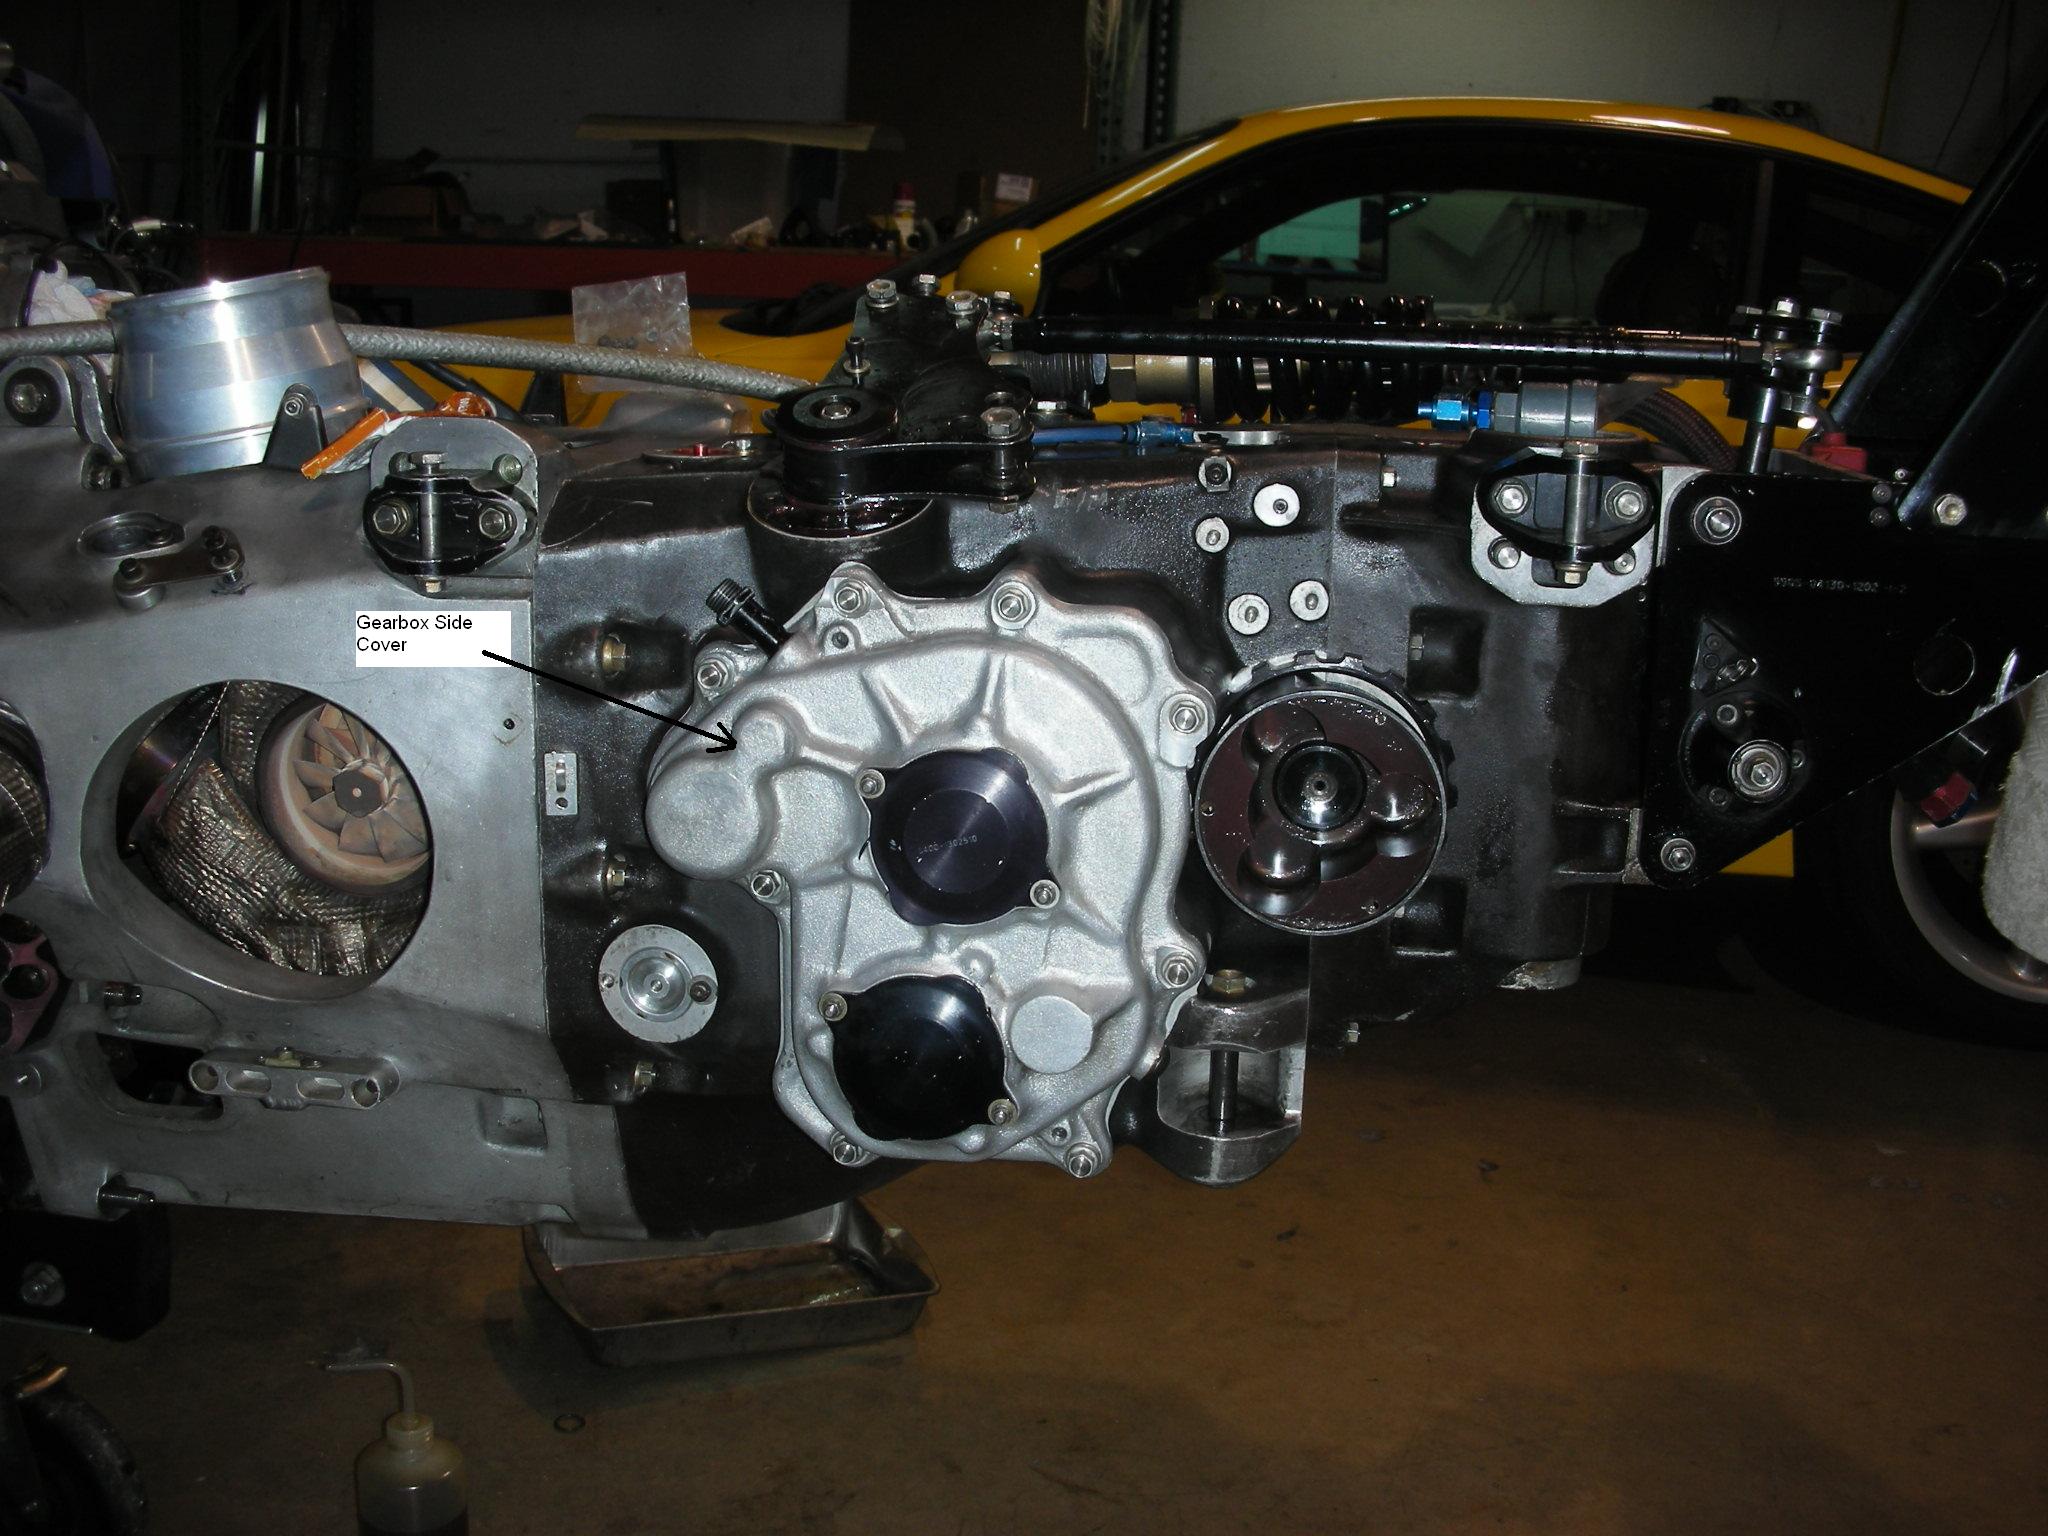
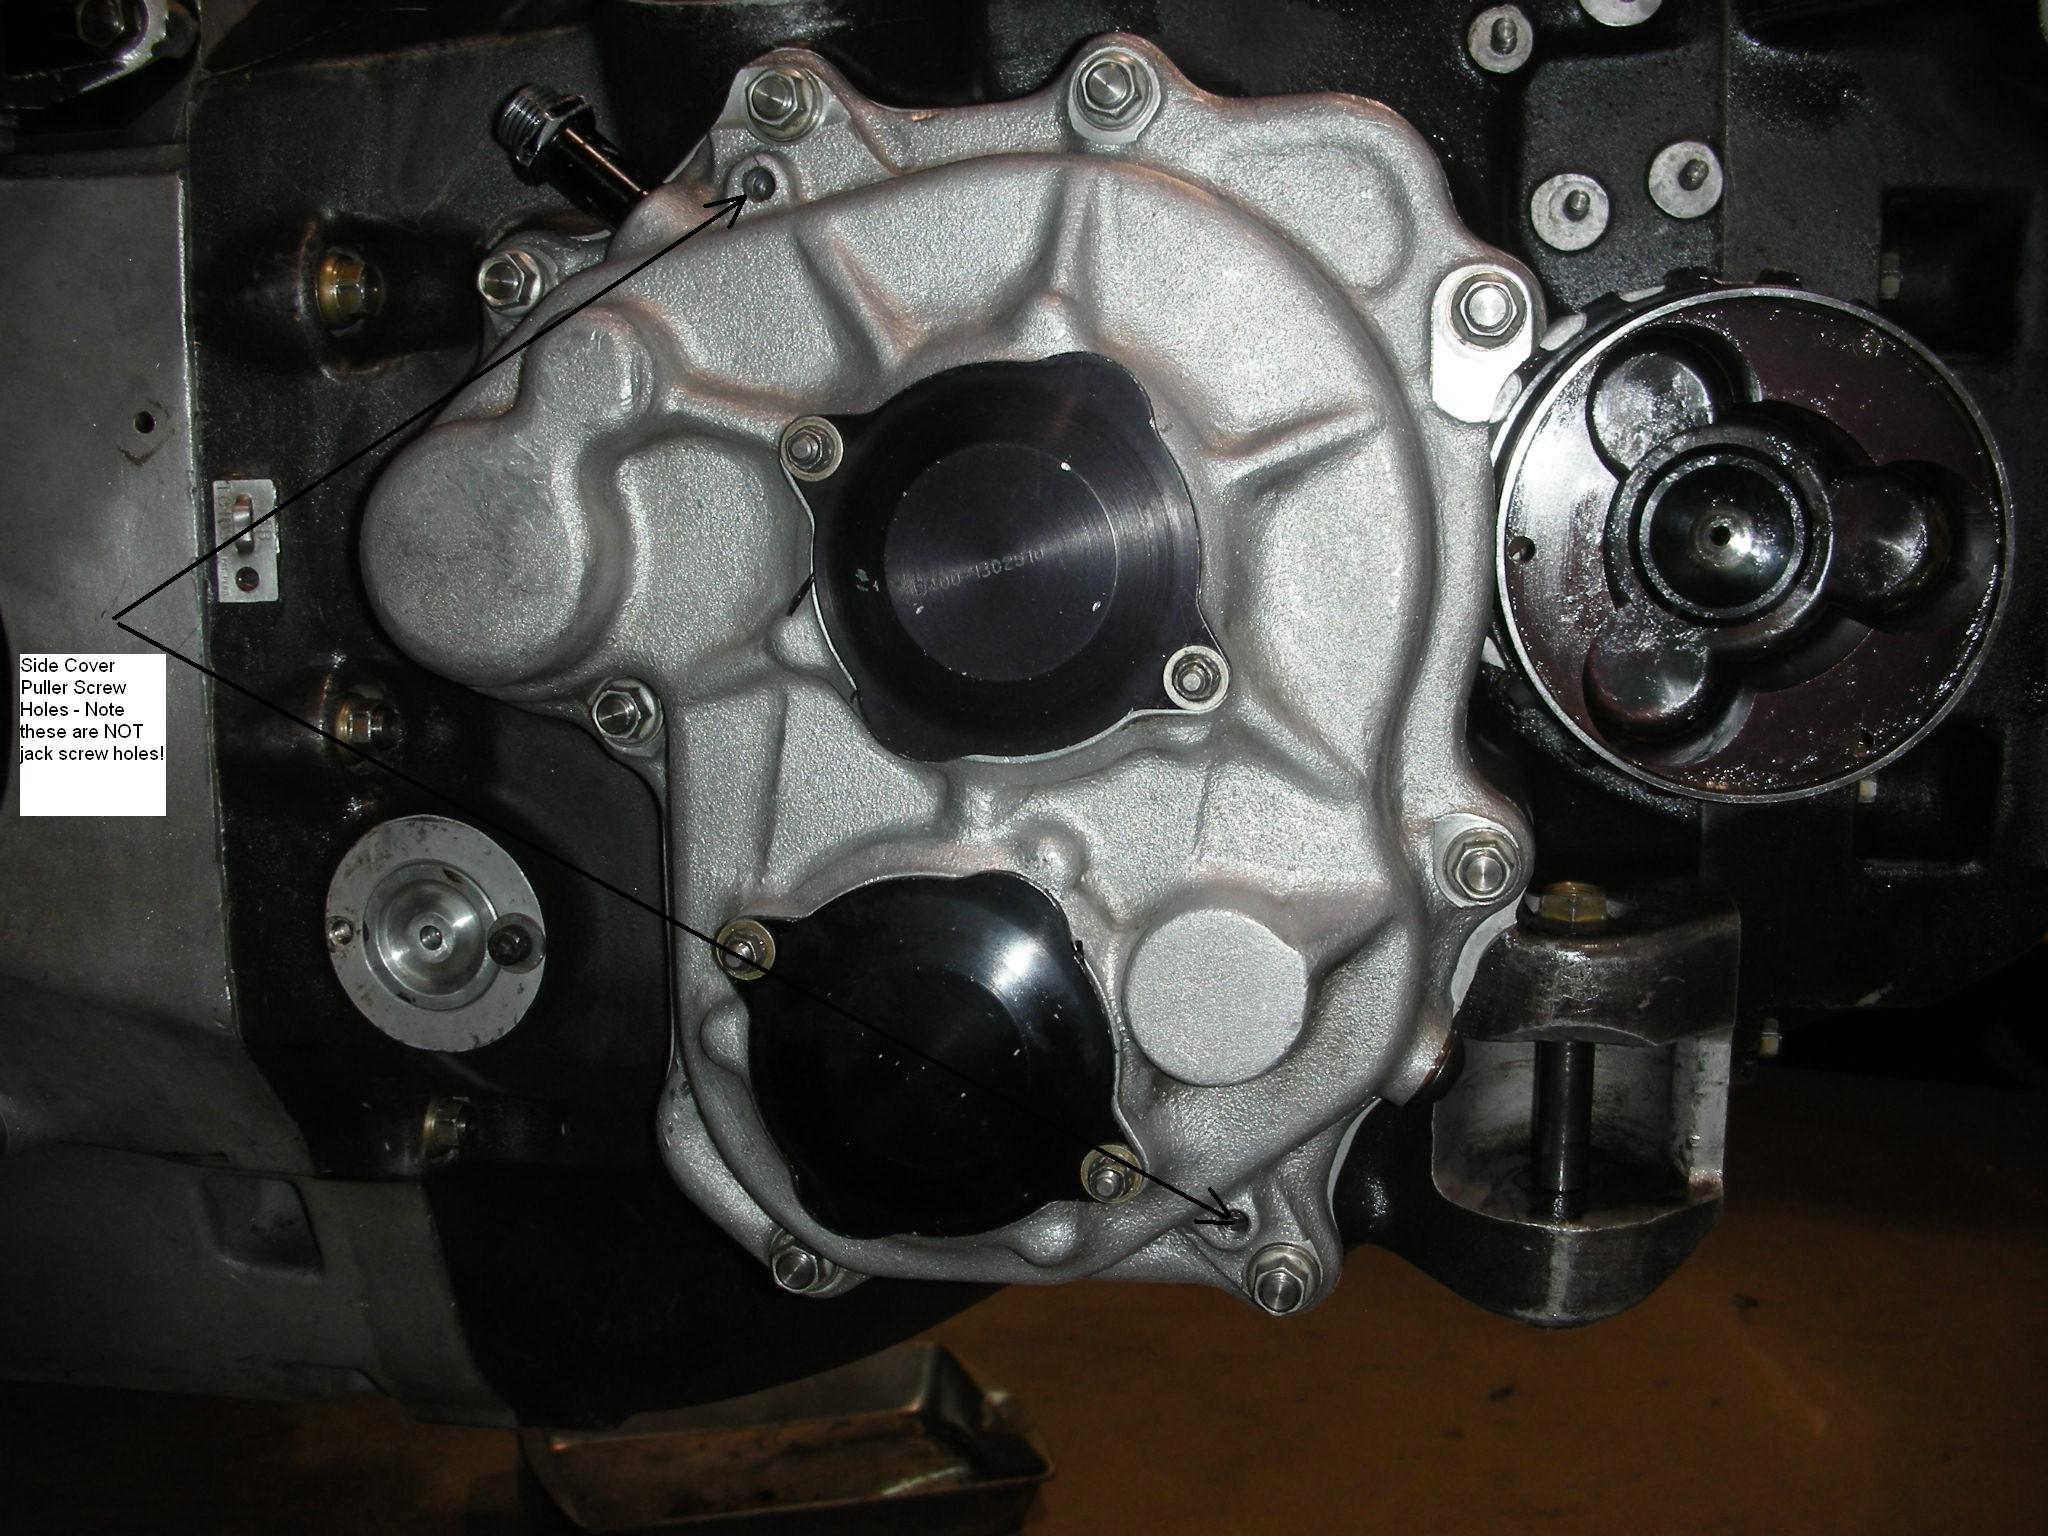
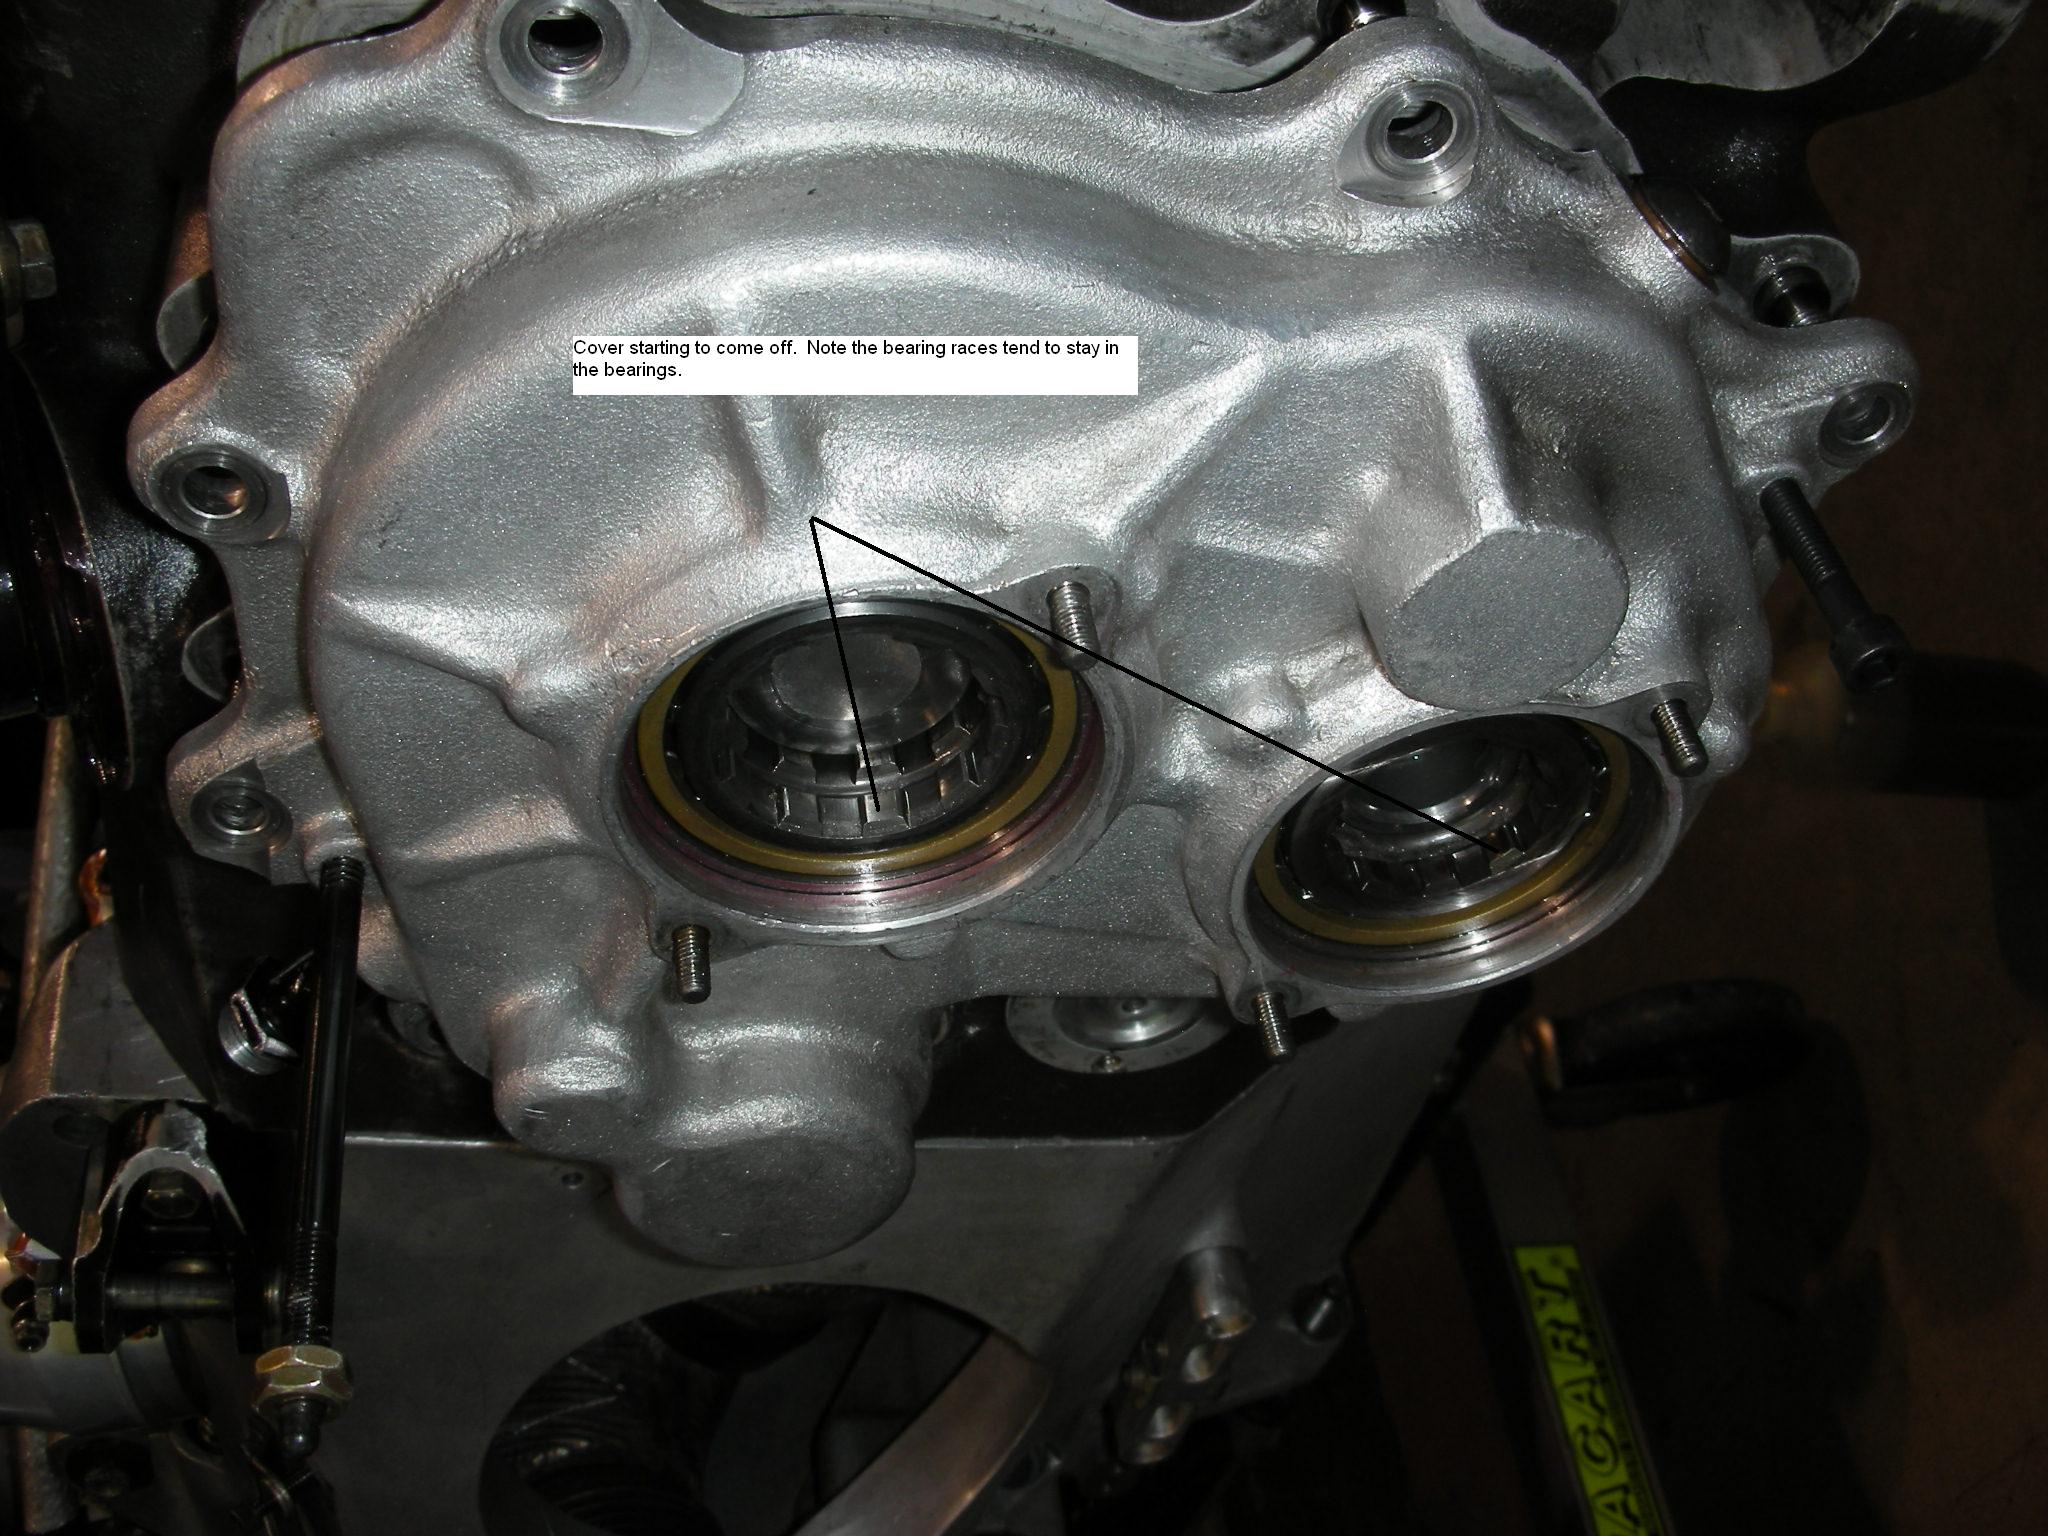
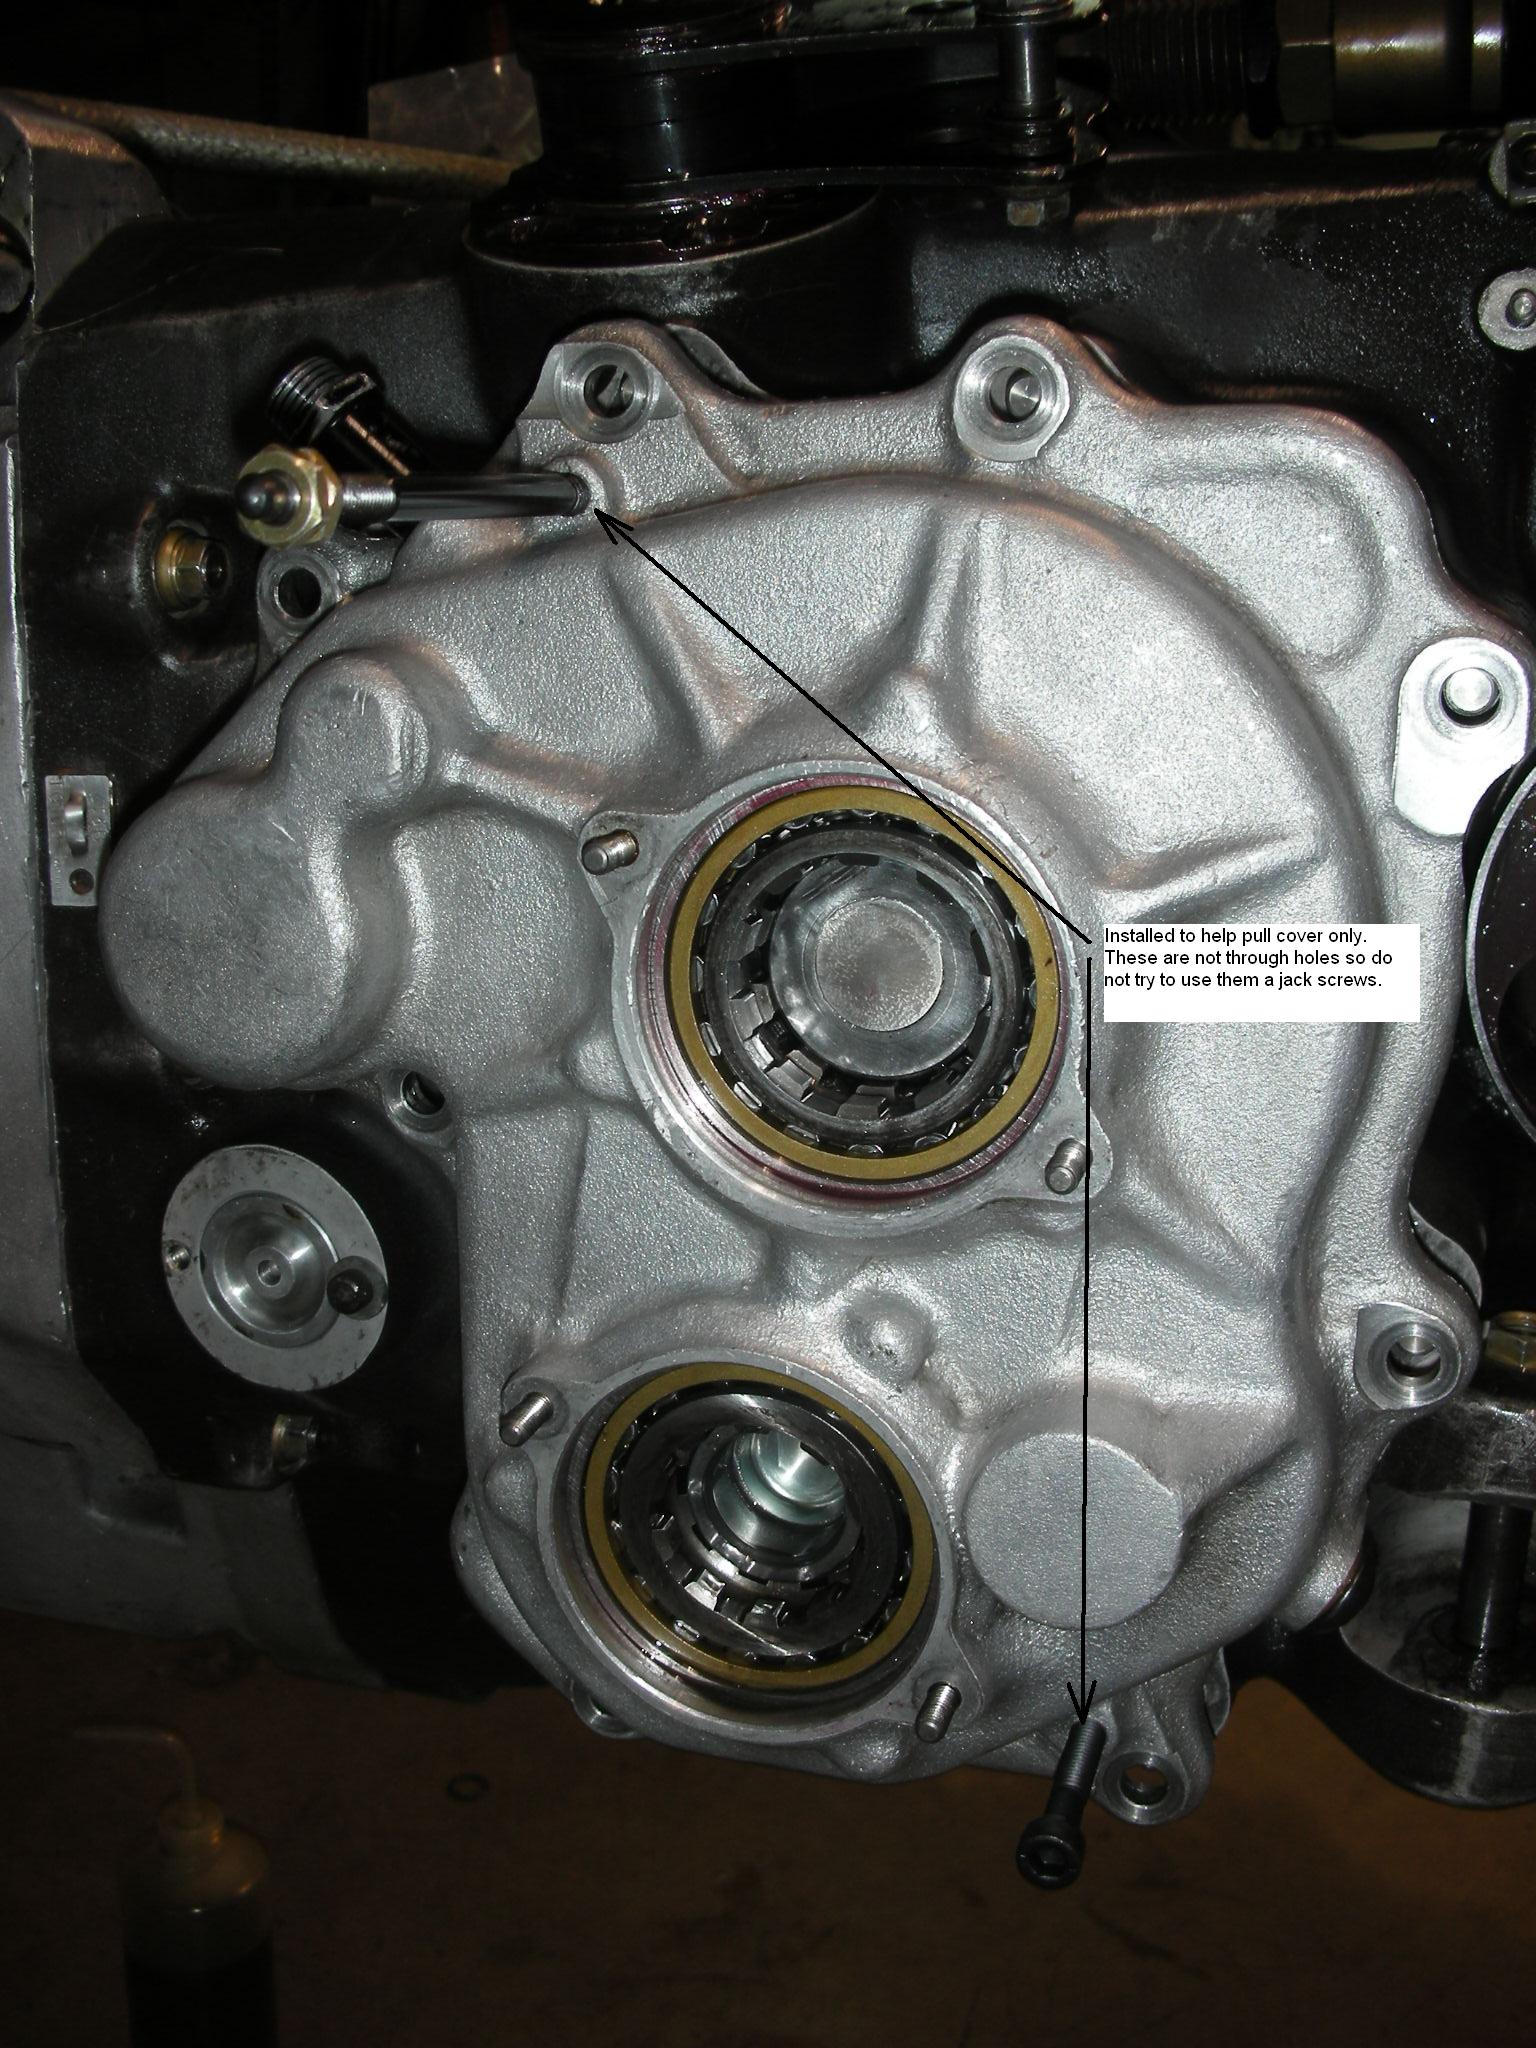
Use two 1/4-20 screws inserted in the gearbox side cover to carefully pull
the side cover off (after removing the side cover securing nuts and the layshaft
nuts, of course). Note that the 1/4-20 holes on the 99 Lola are not
through holes as they are on some cars and thus these are NOT JACK SCREWS and
should not be used in an attempt to "jack" the side cover away from the main
gearbox housing.
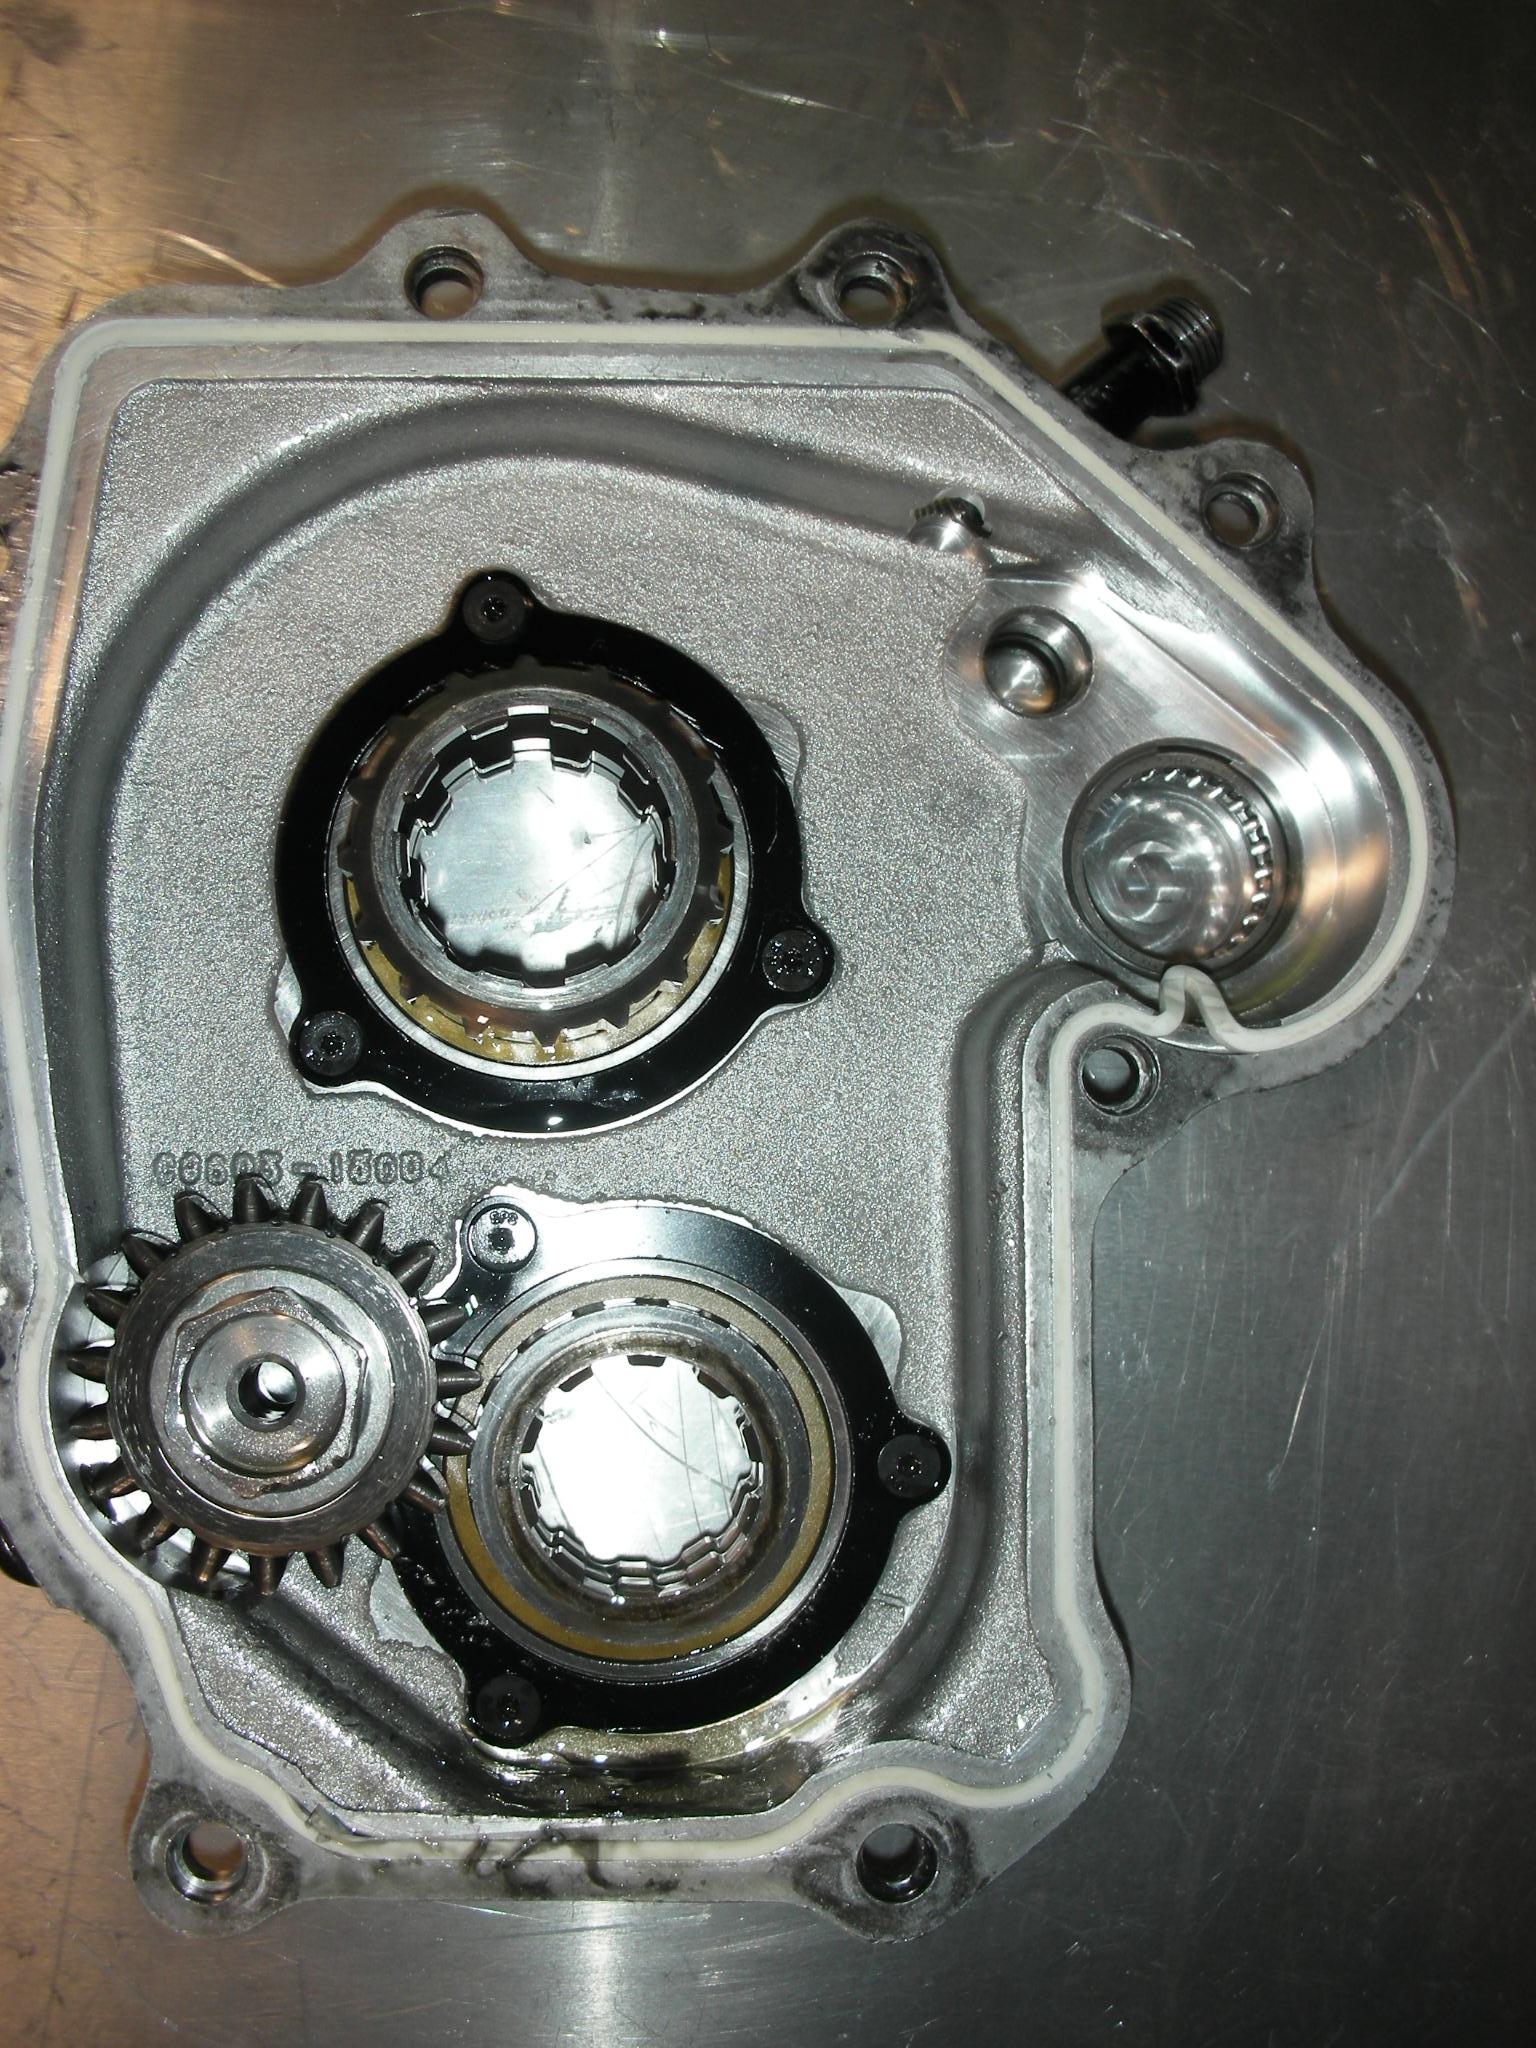
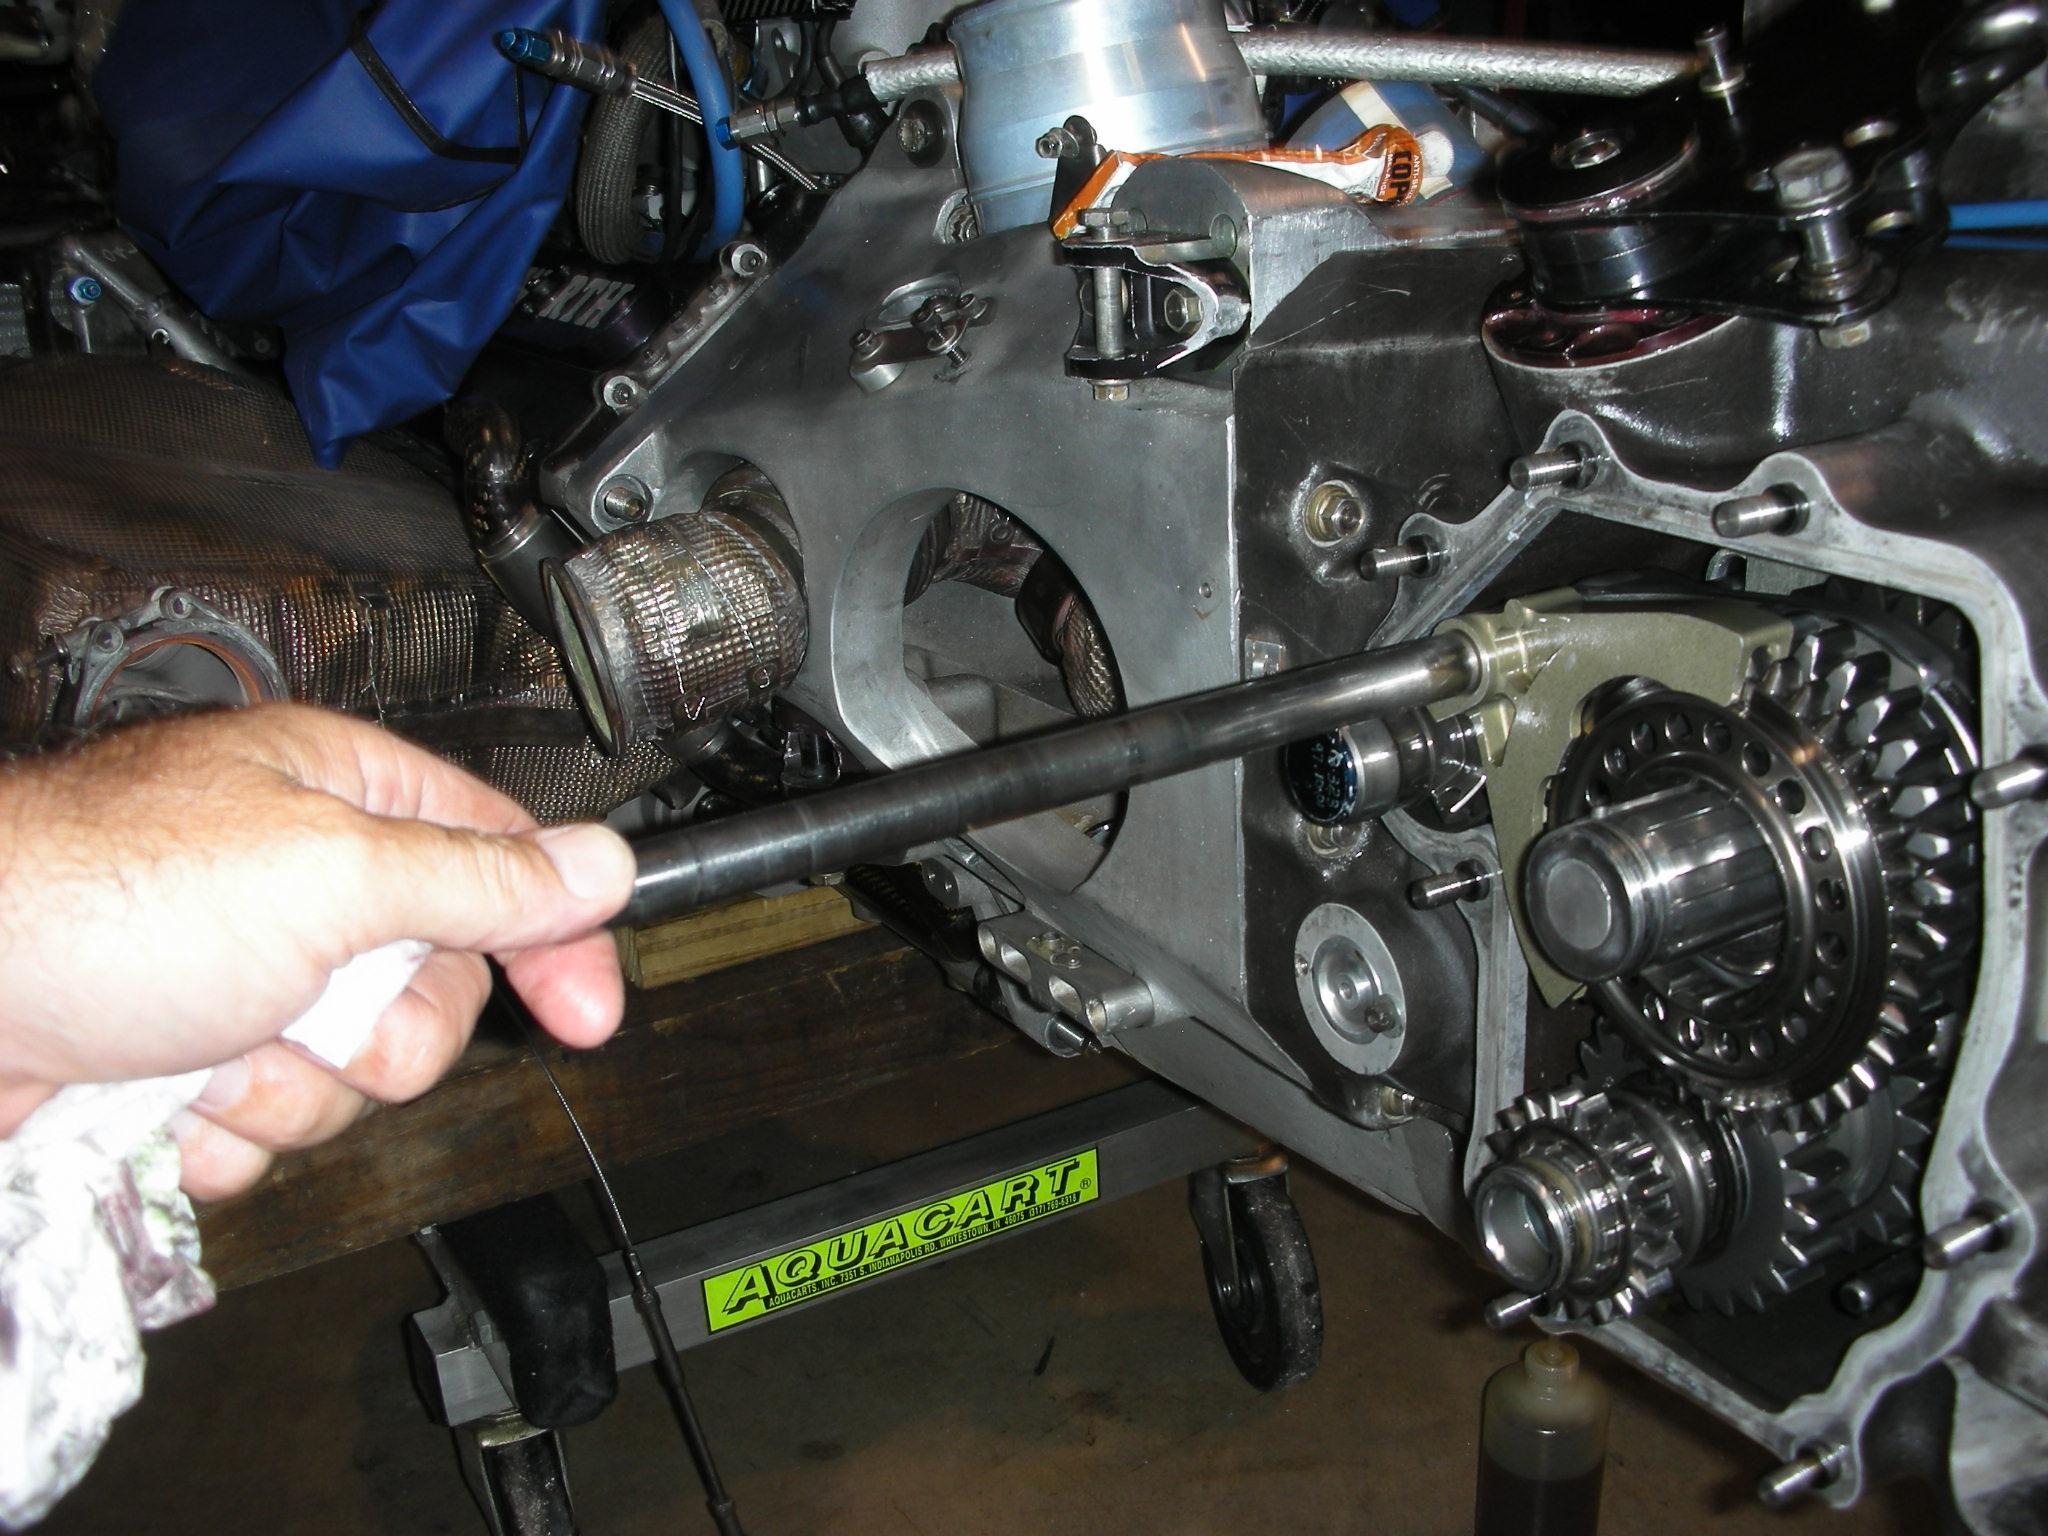
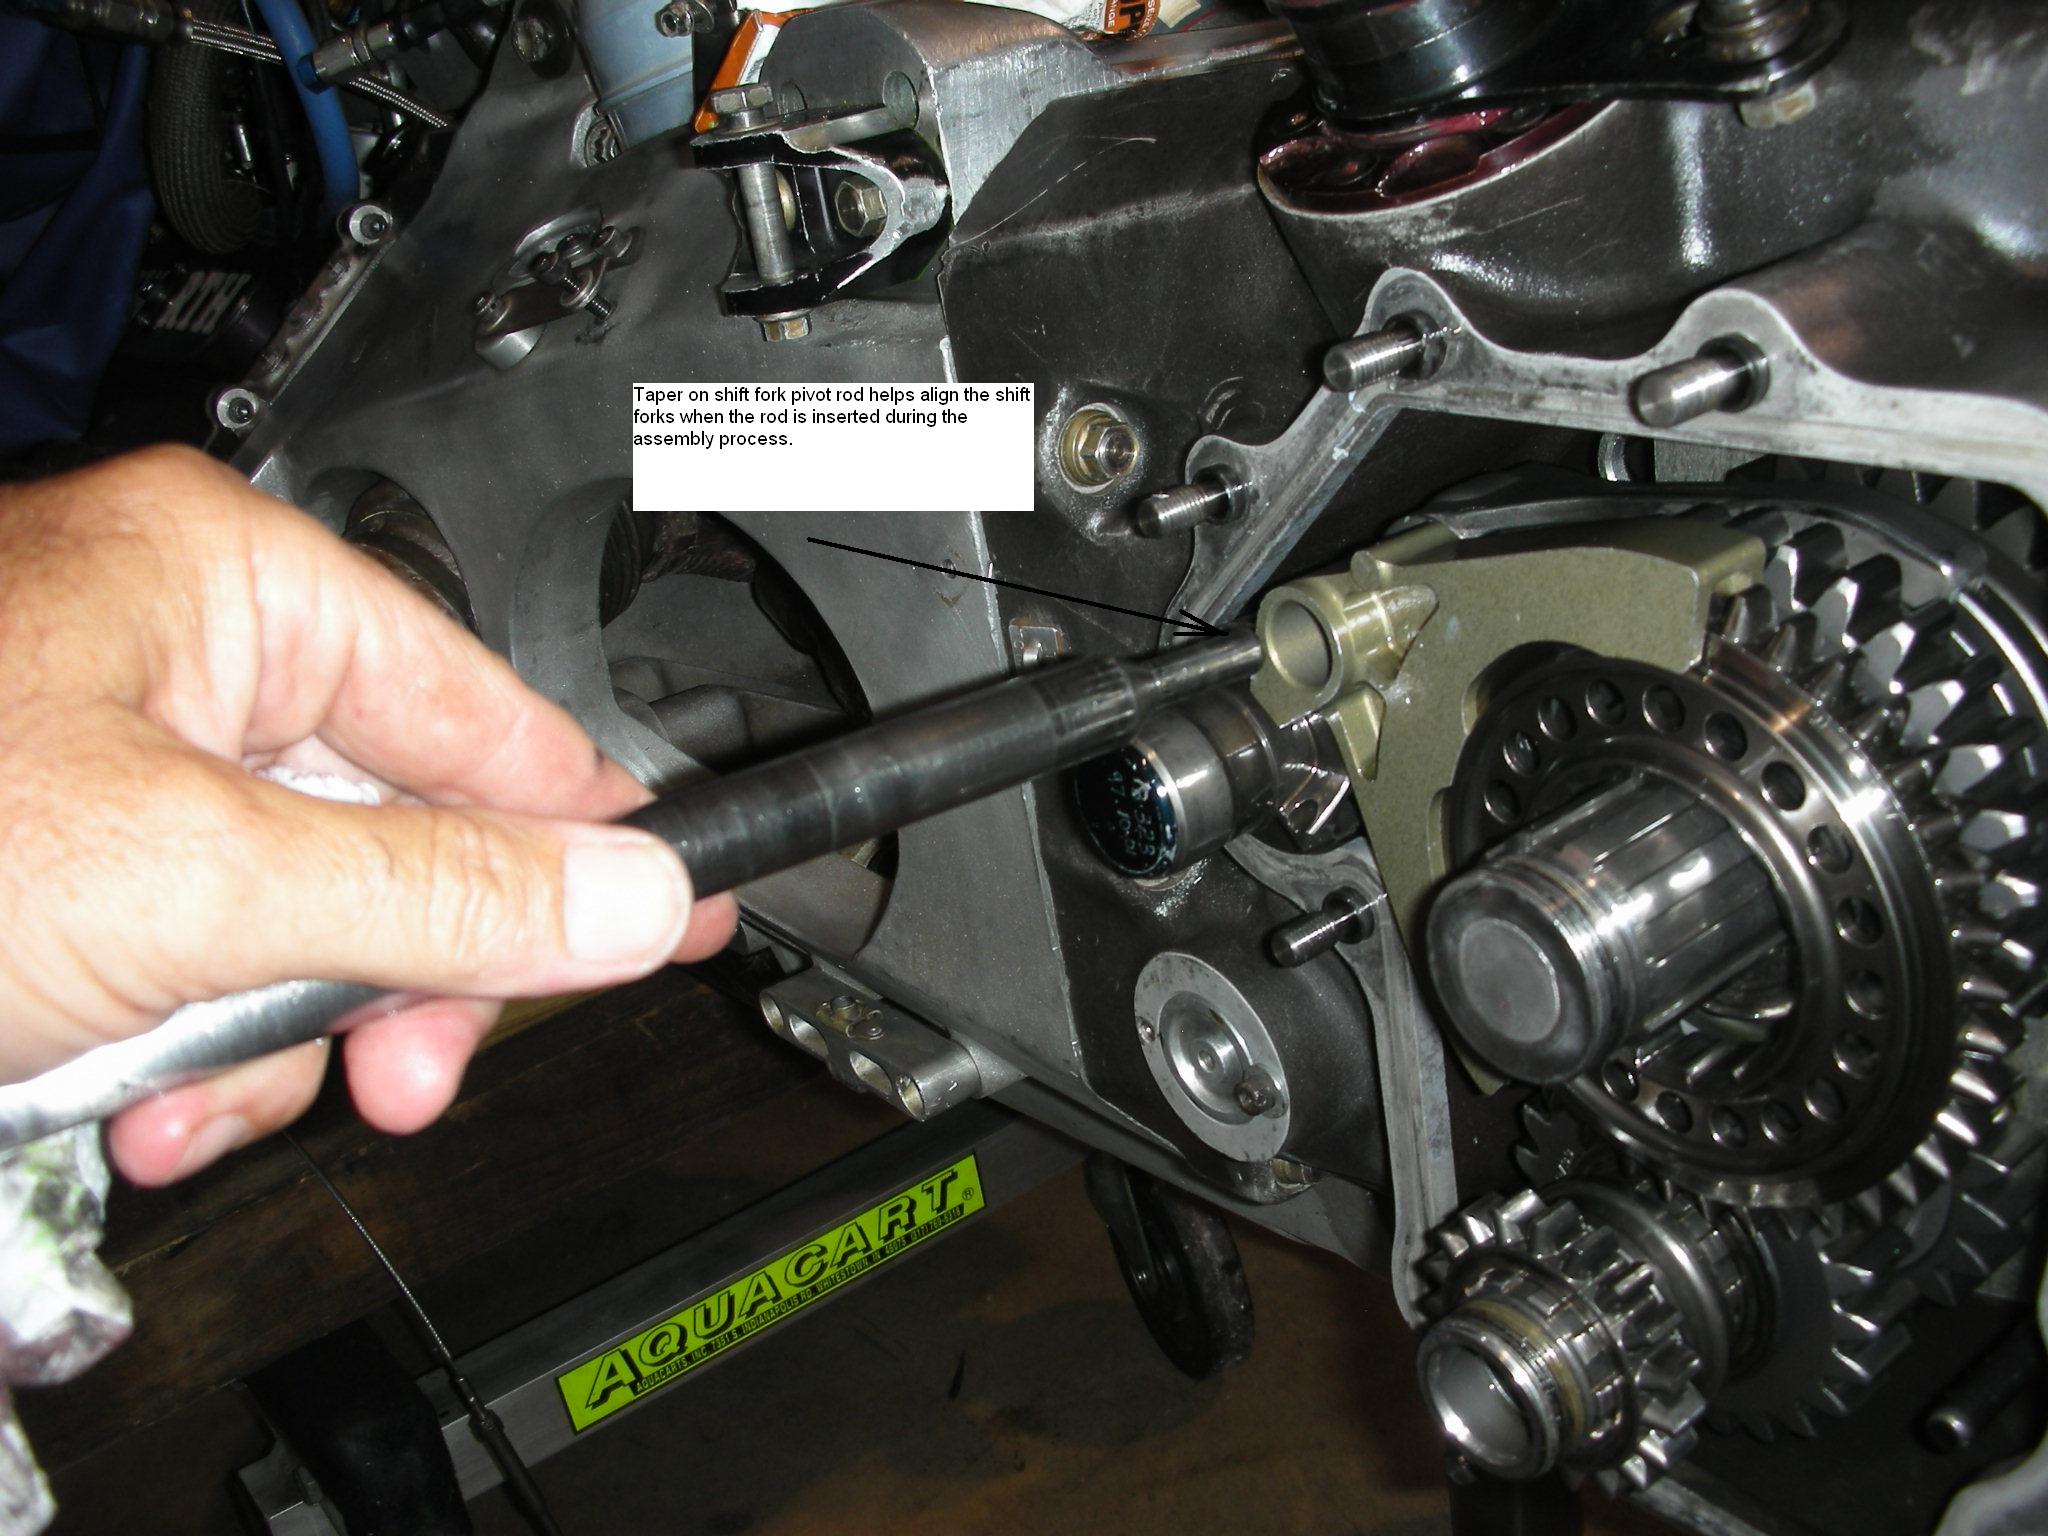
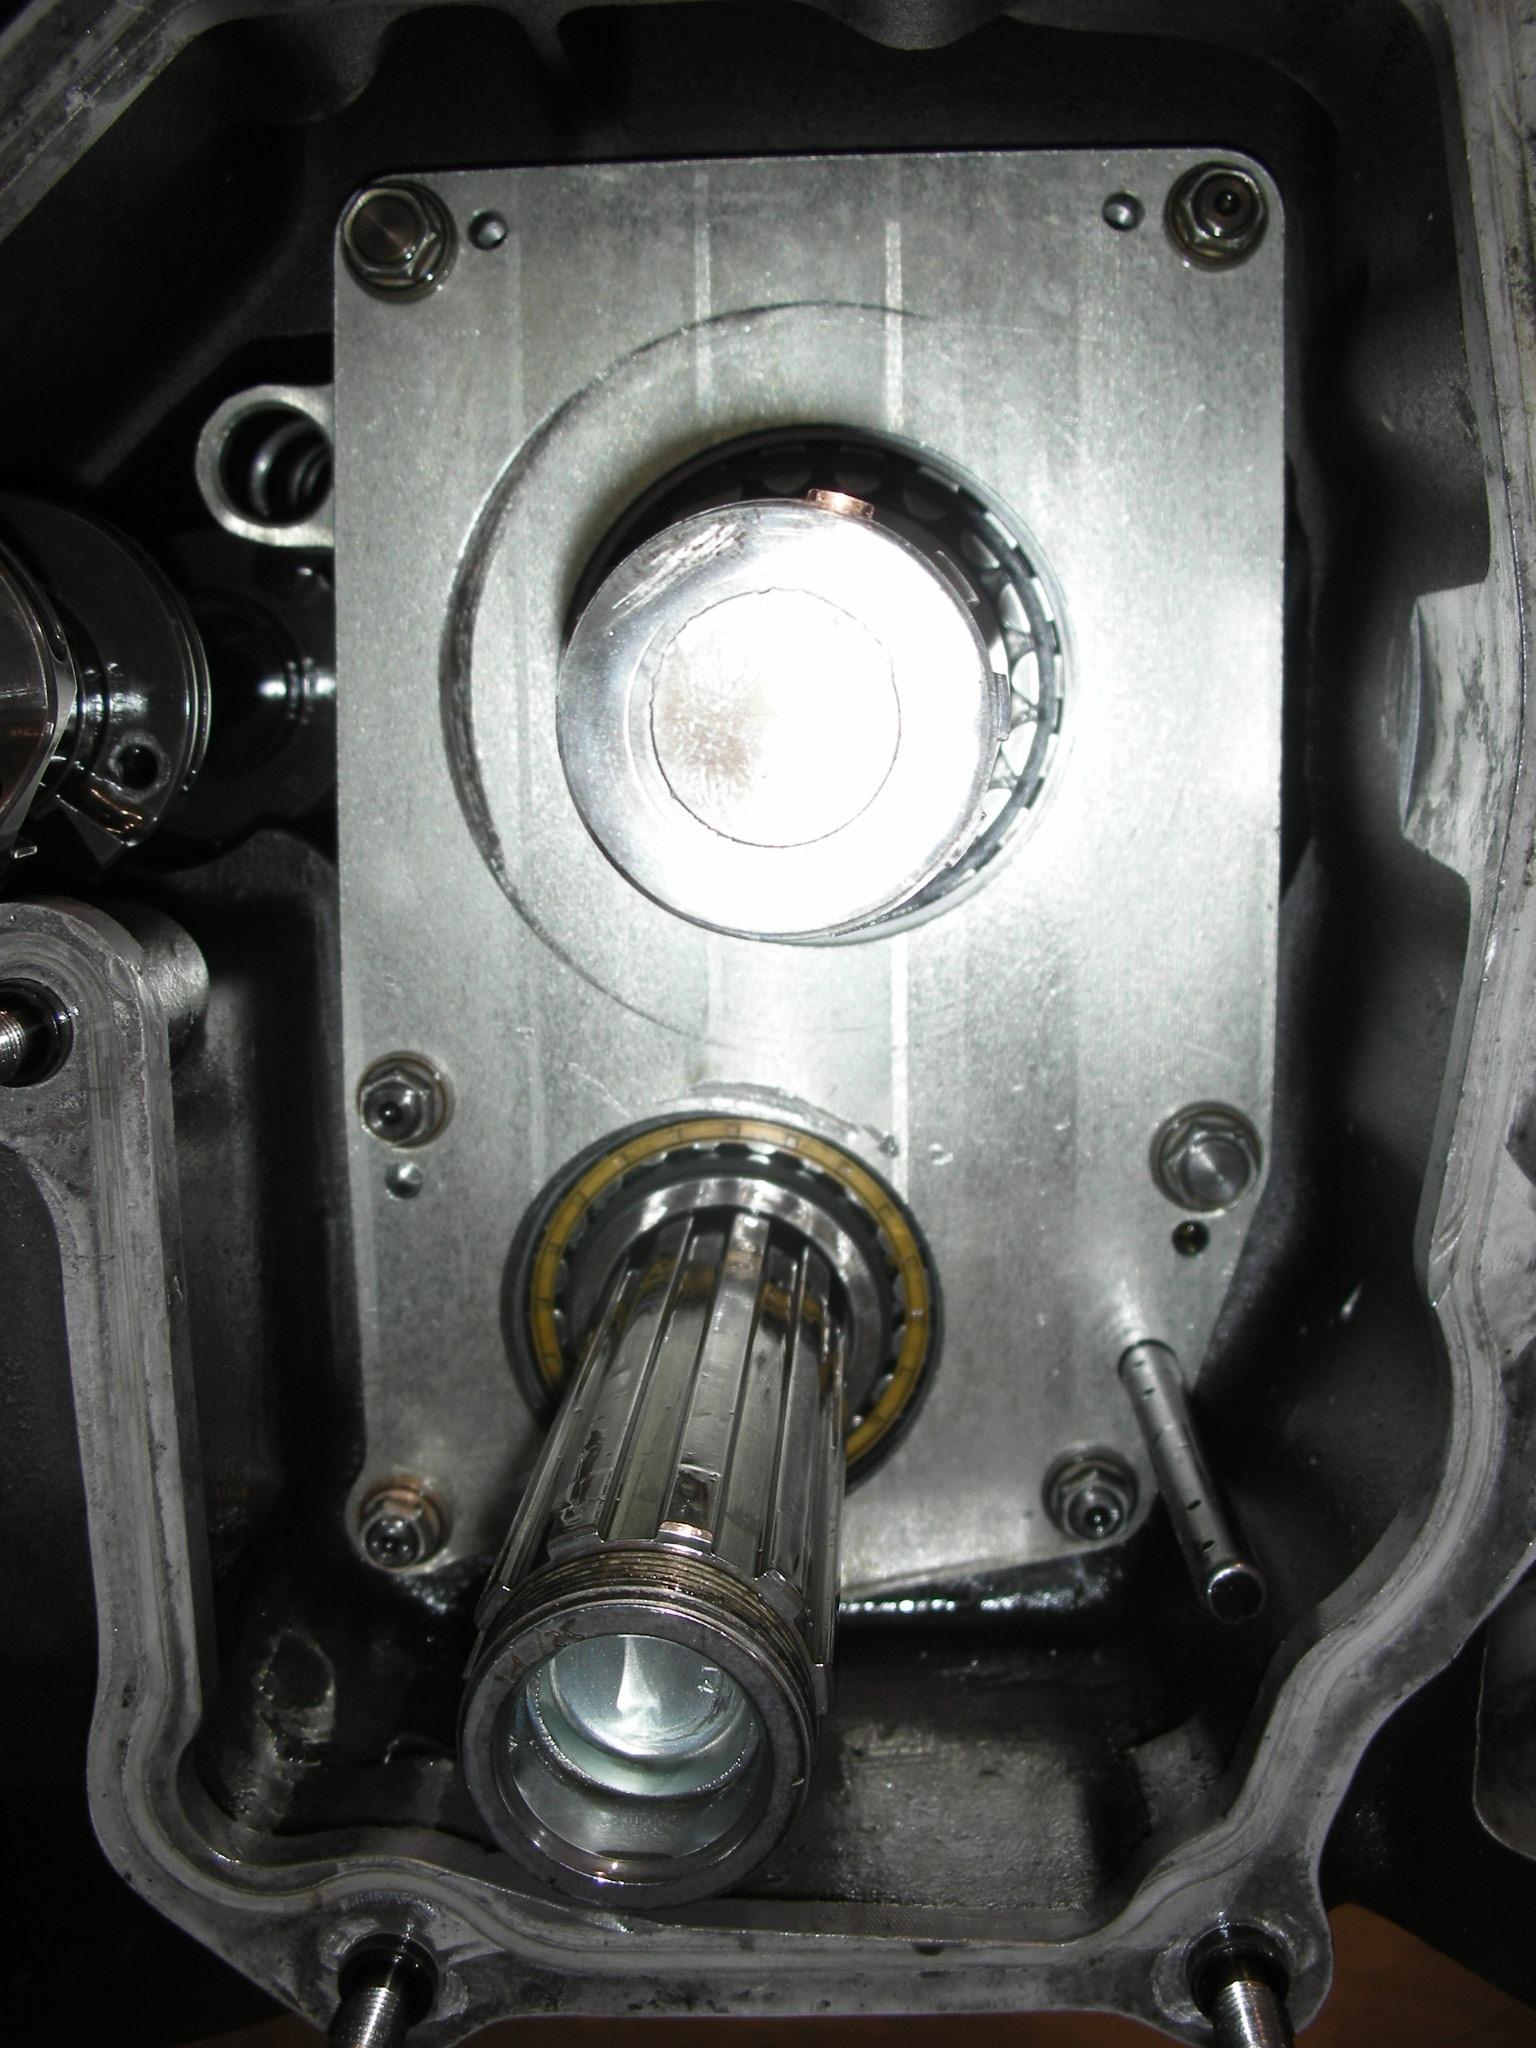
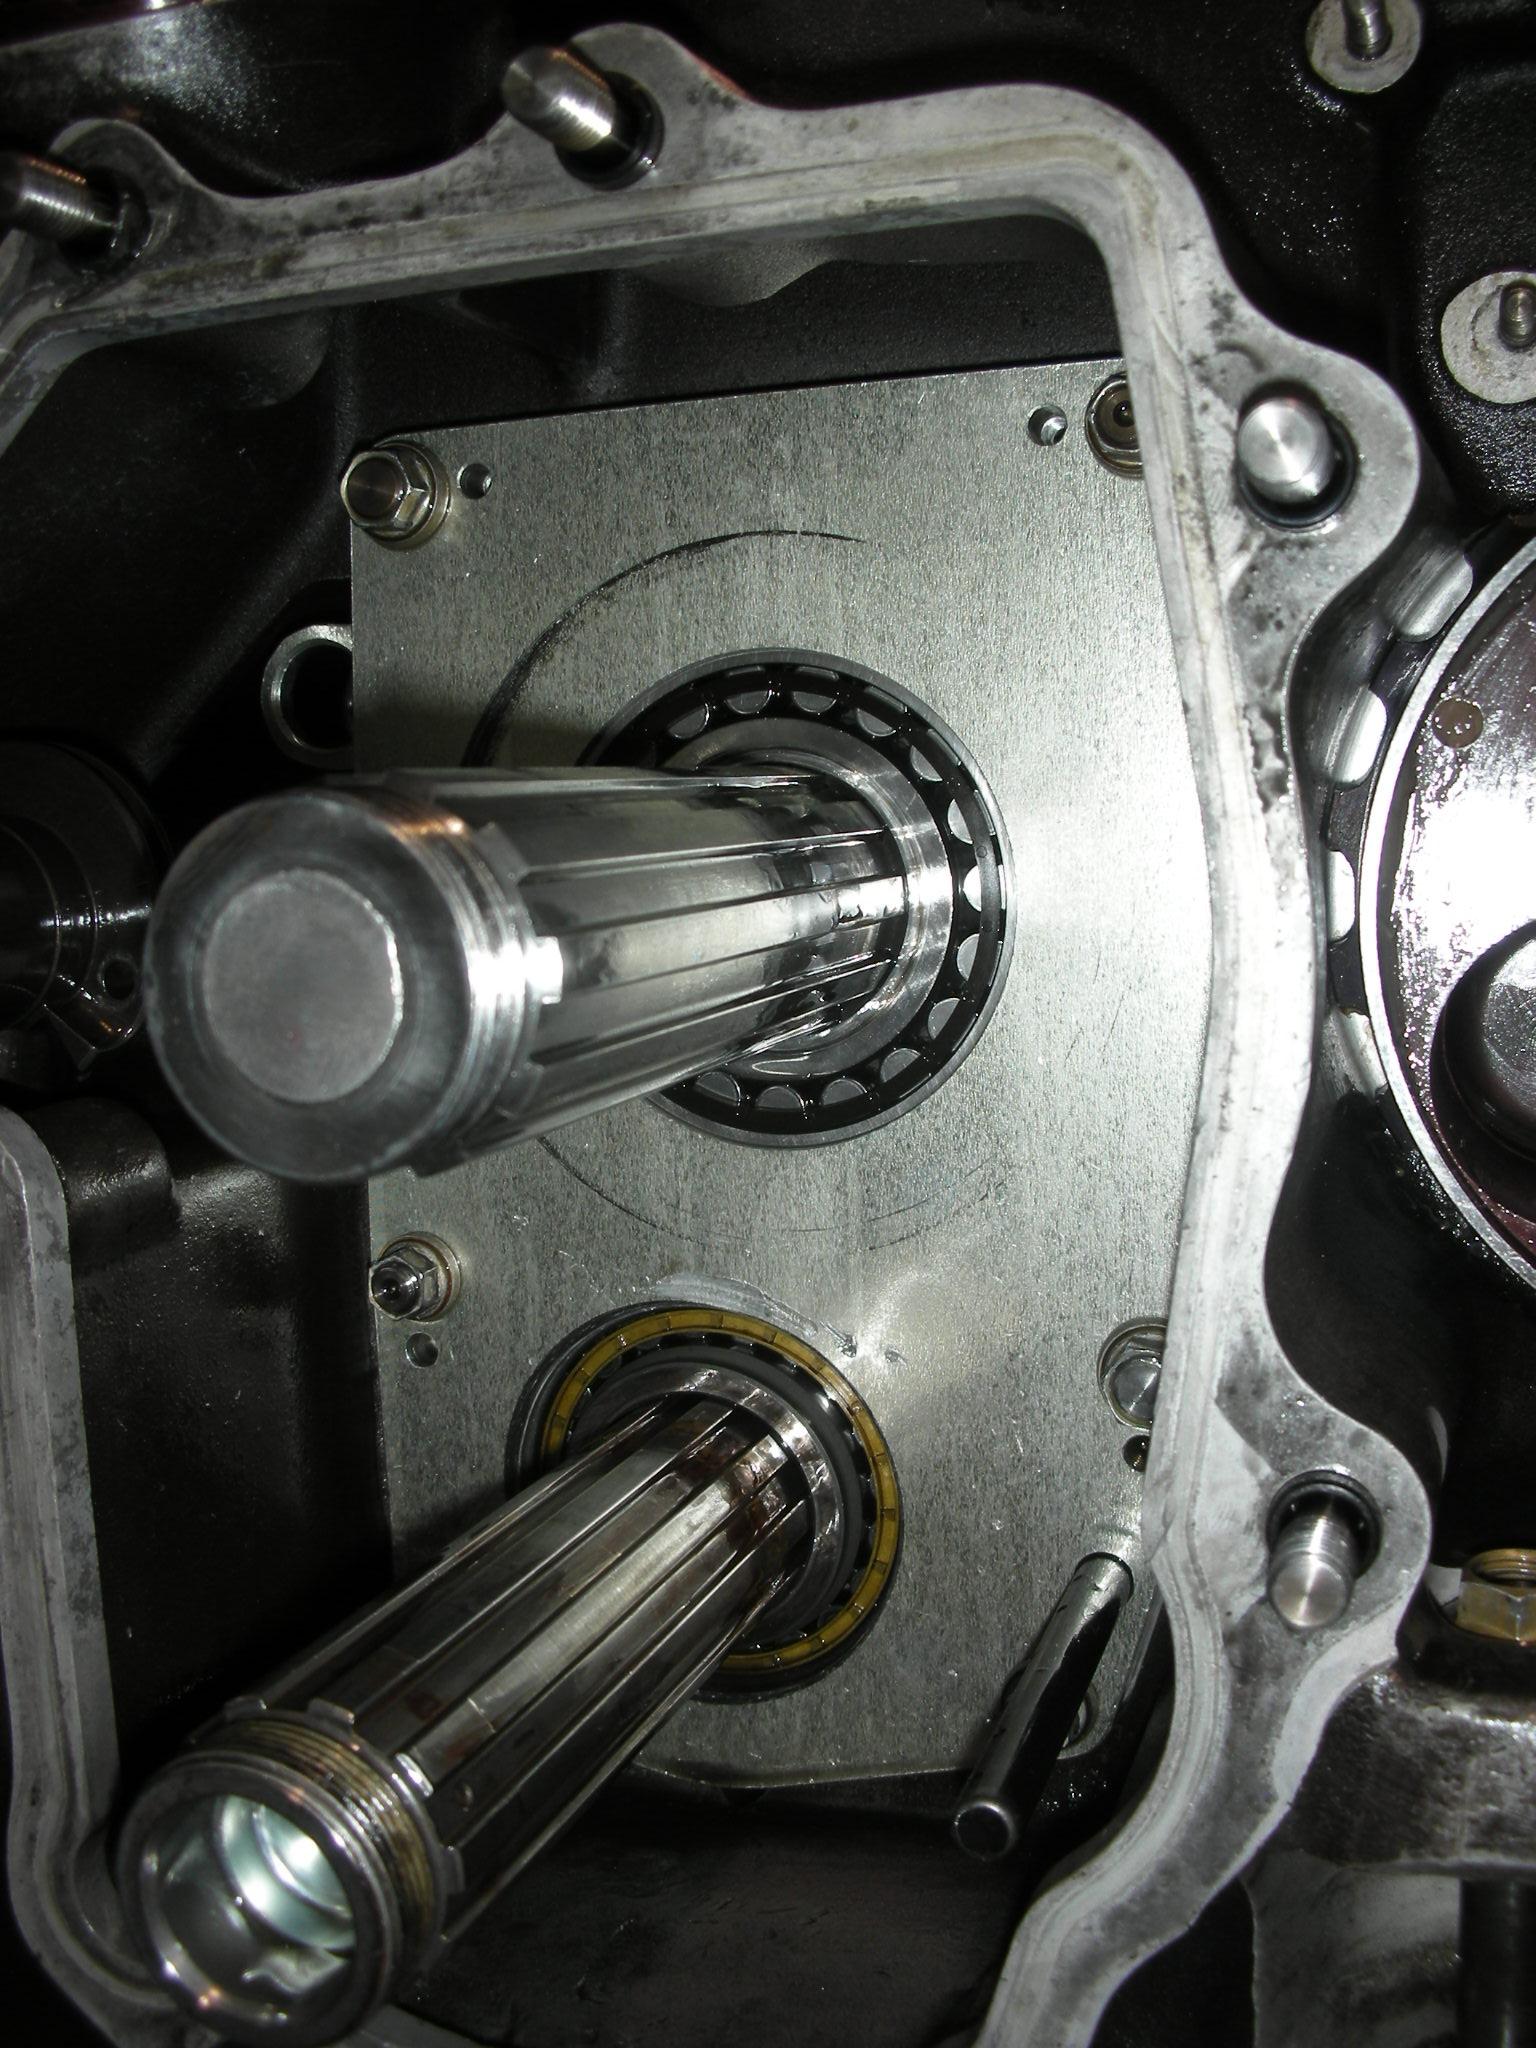
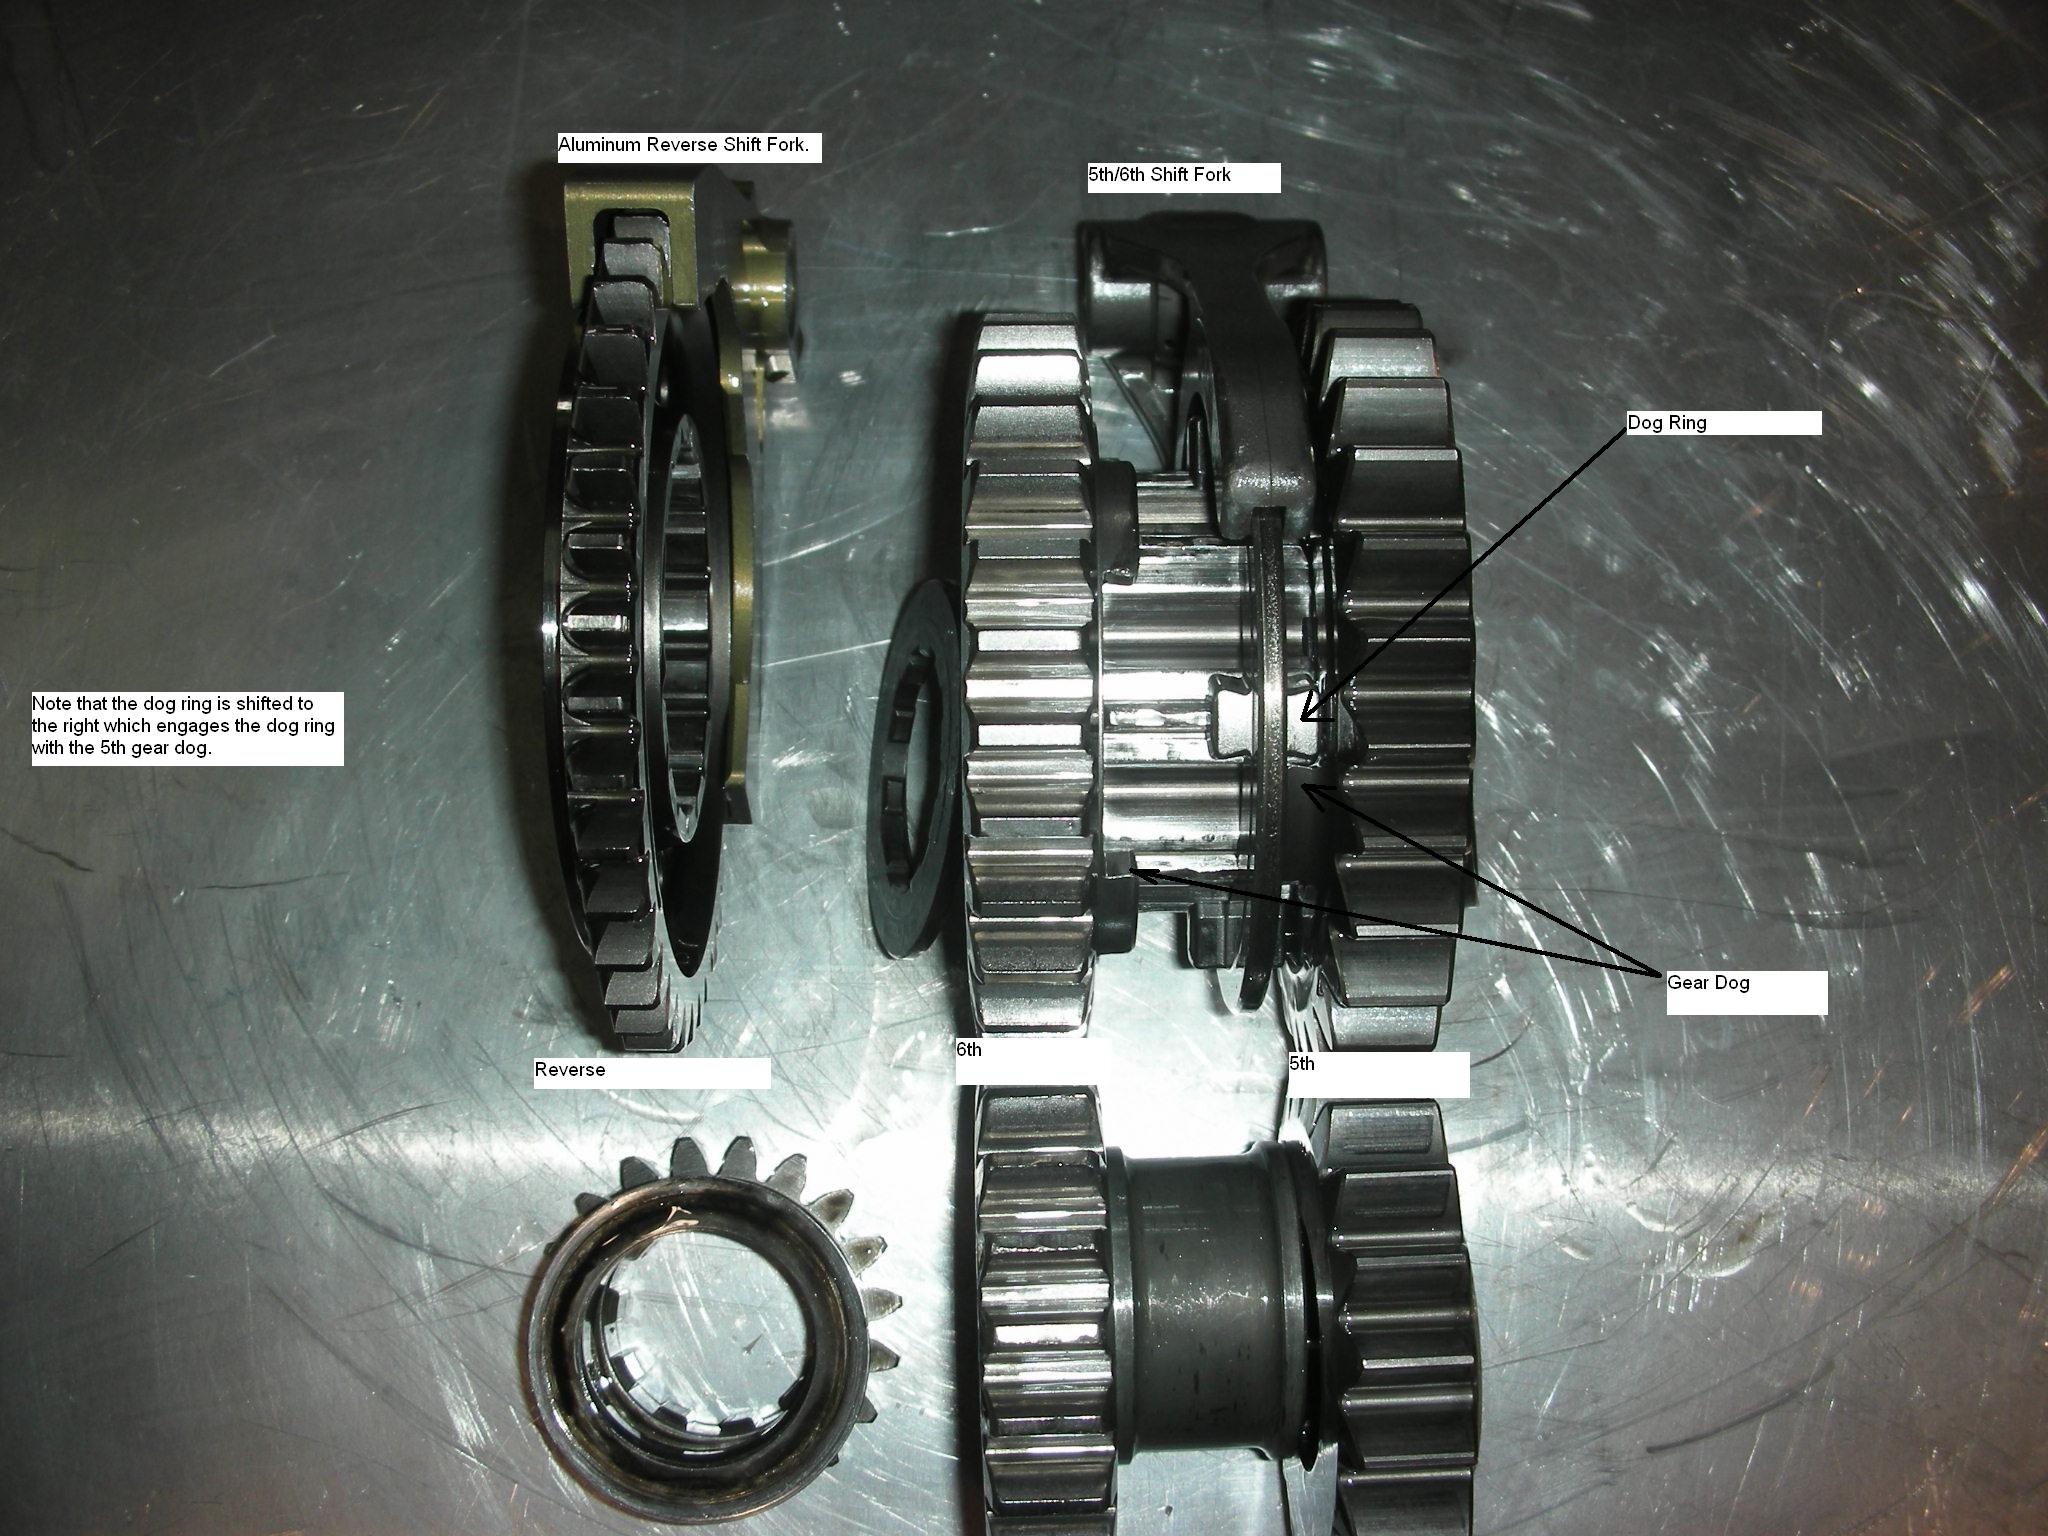
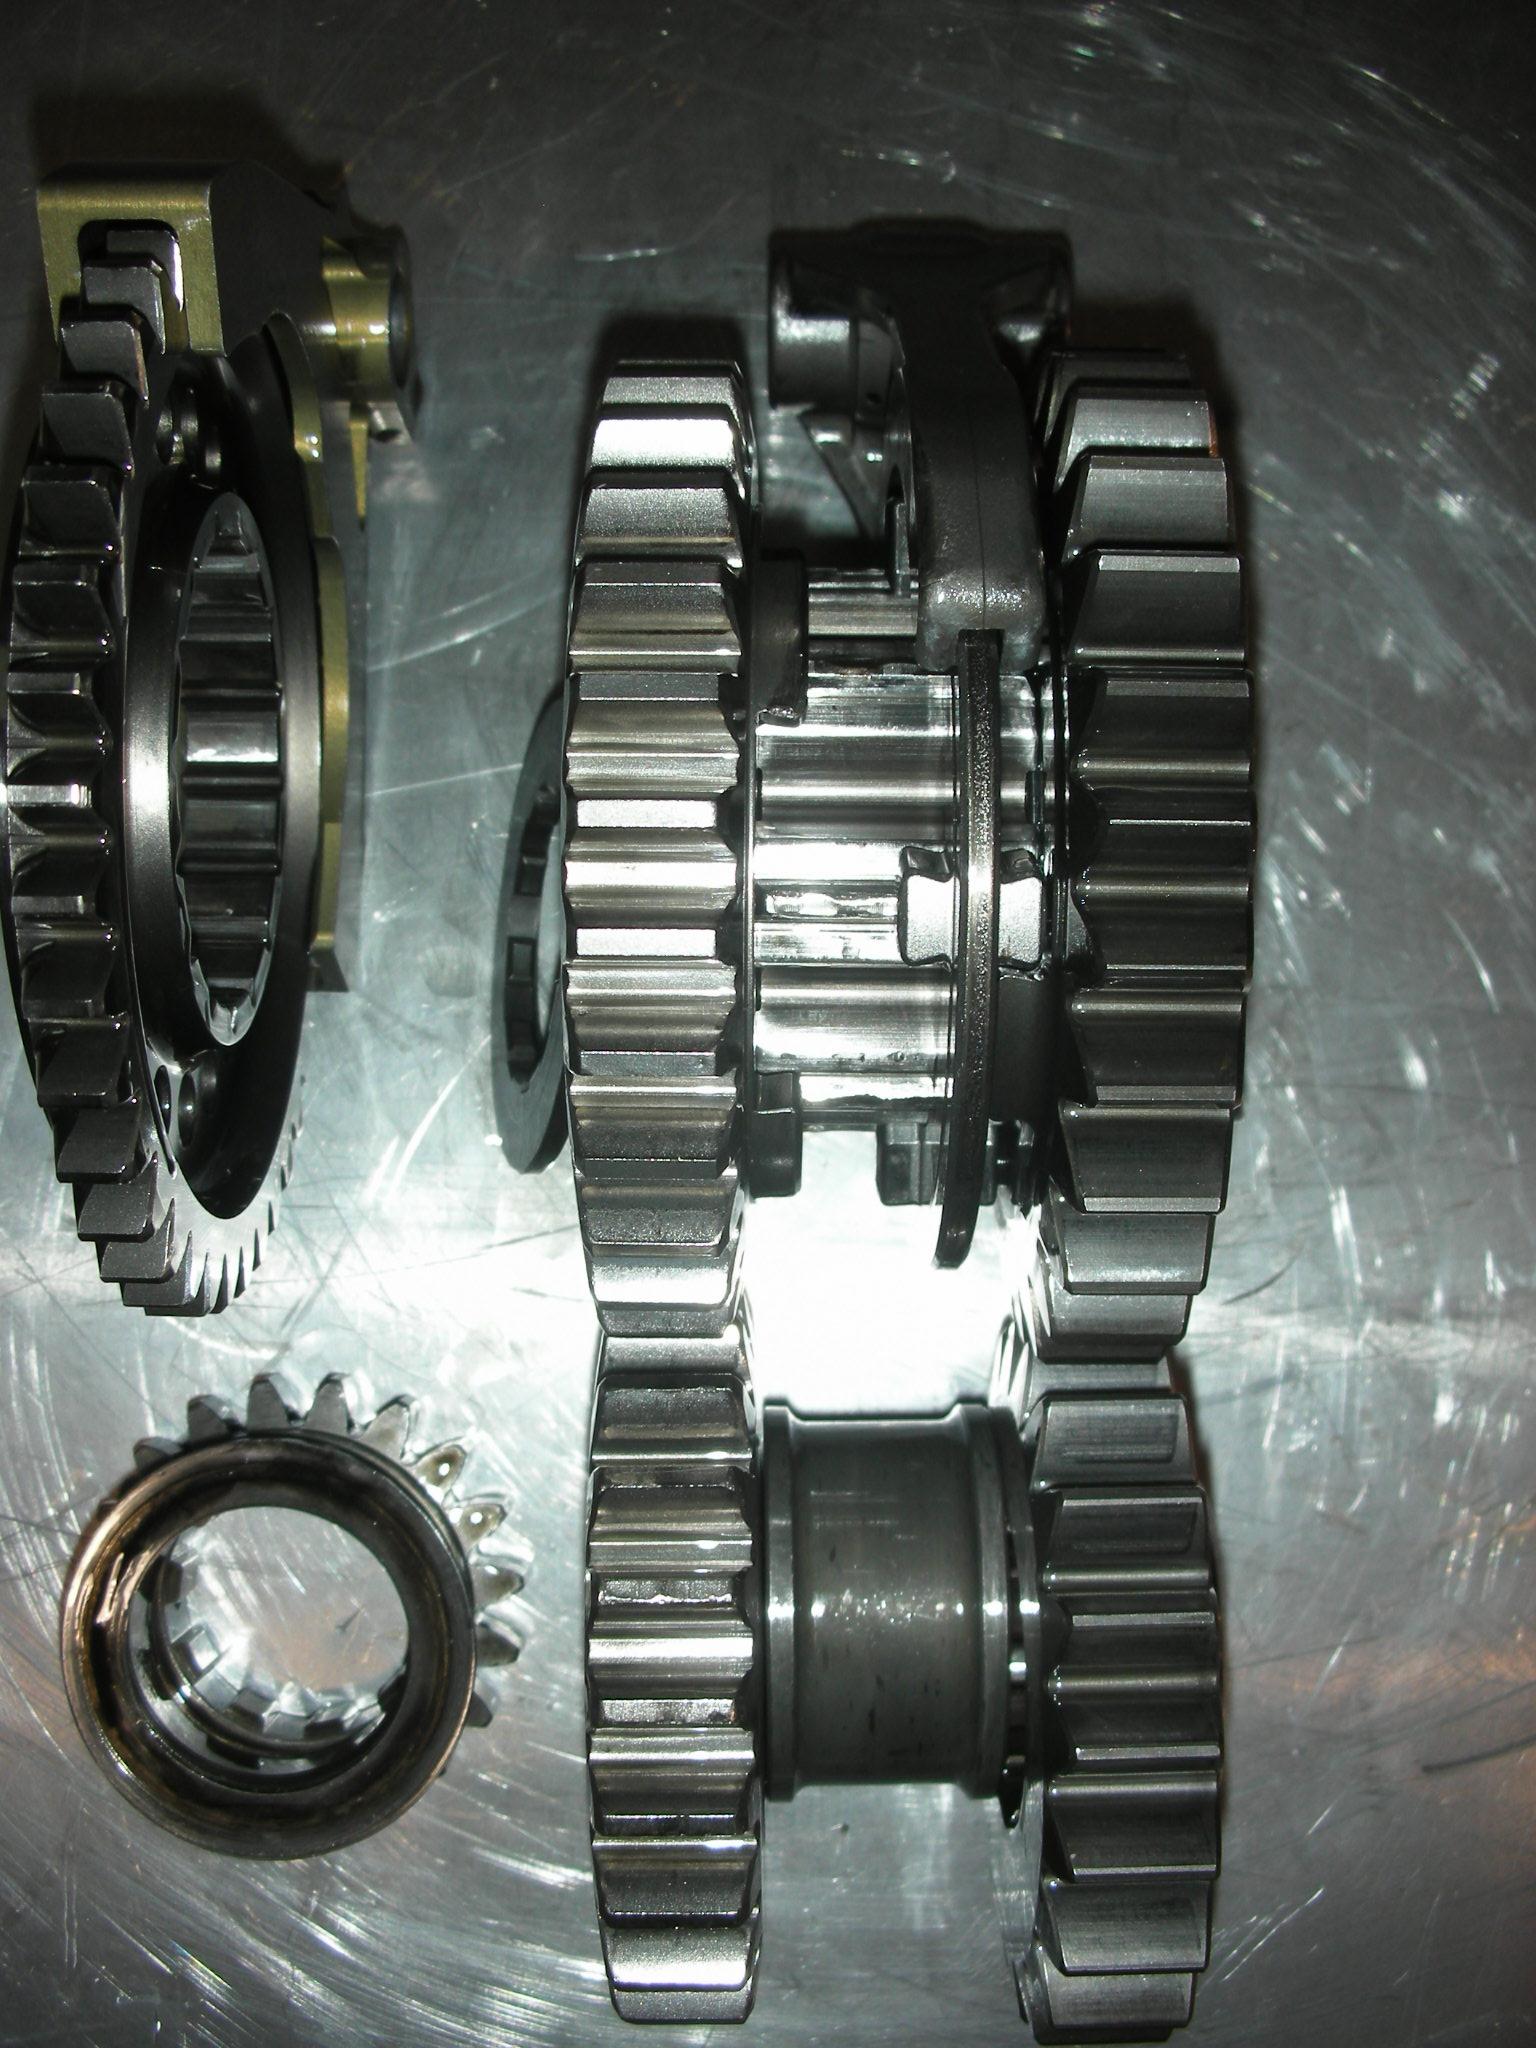
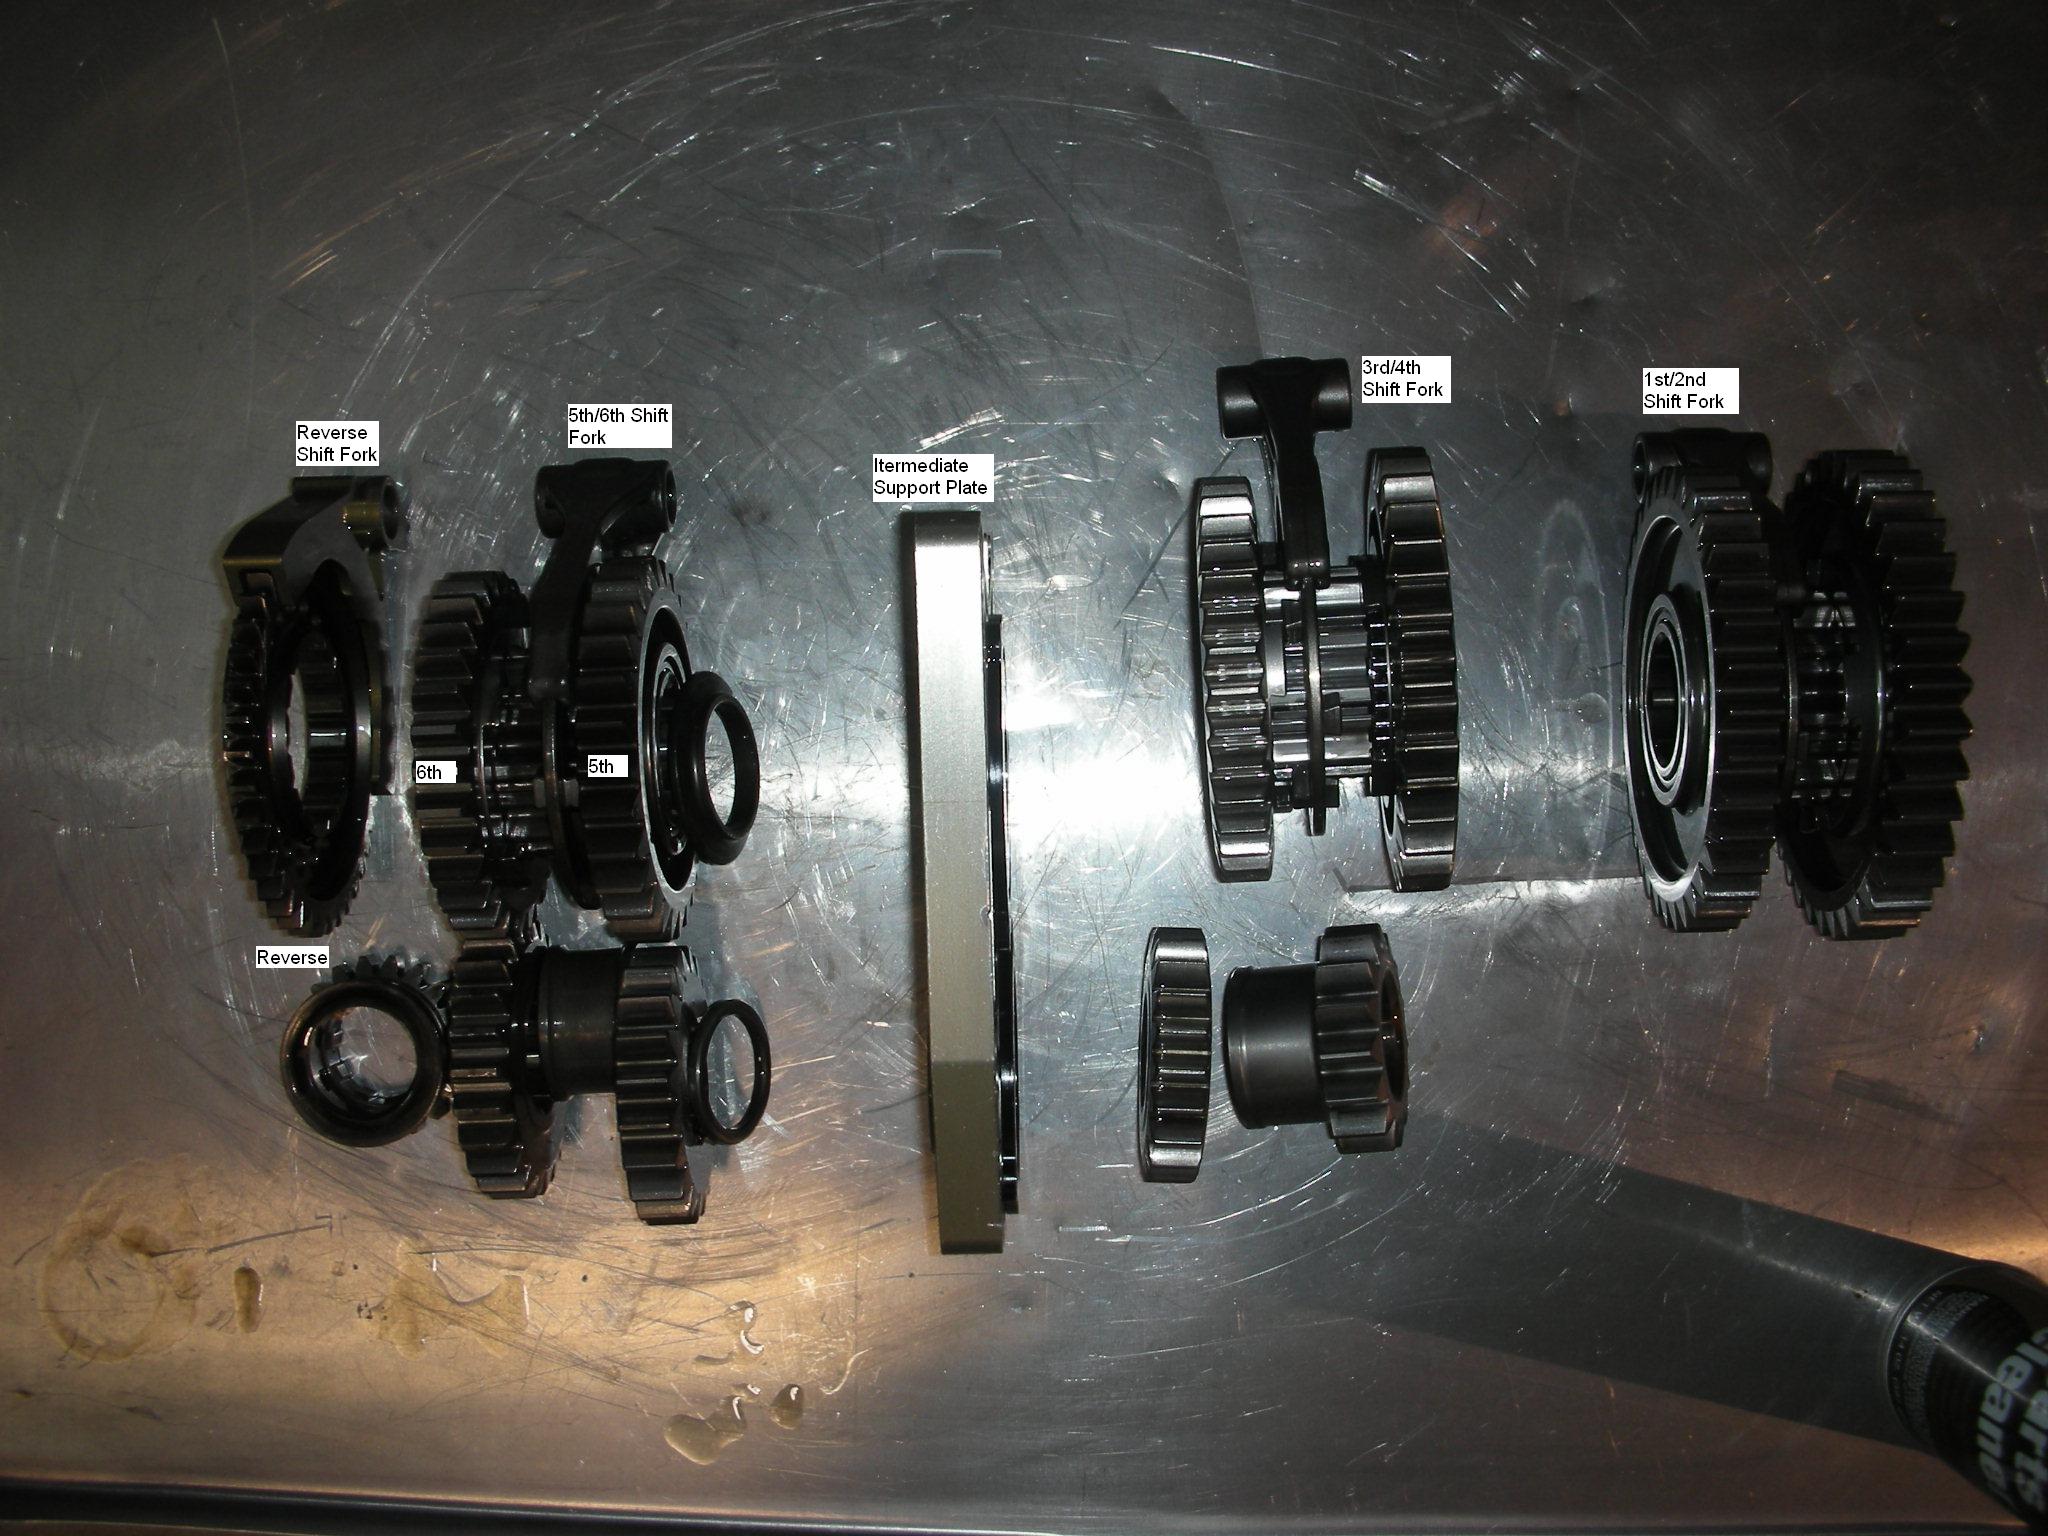
Once the side cover is removed you can pull the shift fork pivot rod and
remove the reverse, 6th and 5th gears along with their associated shift forks
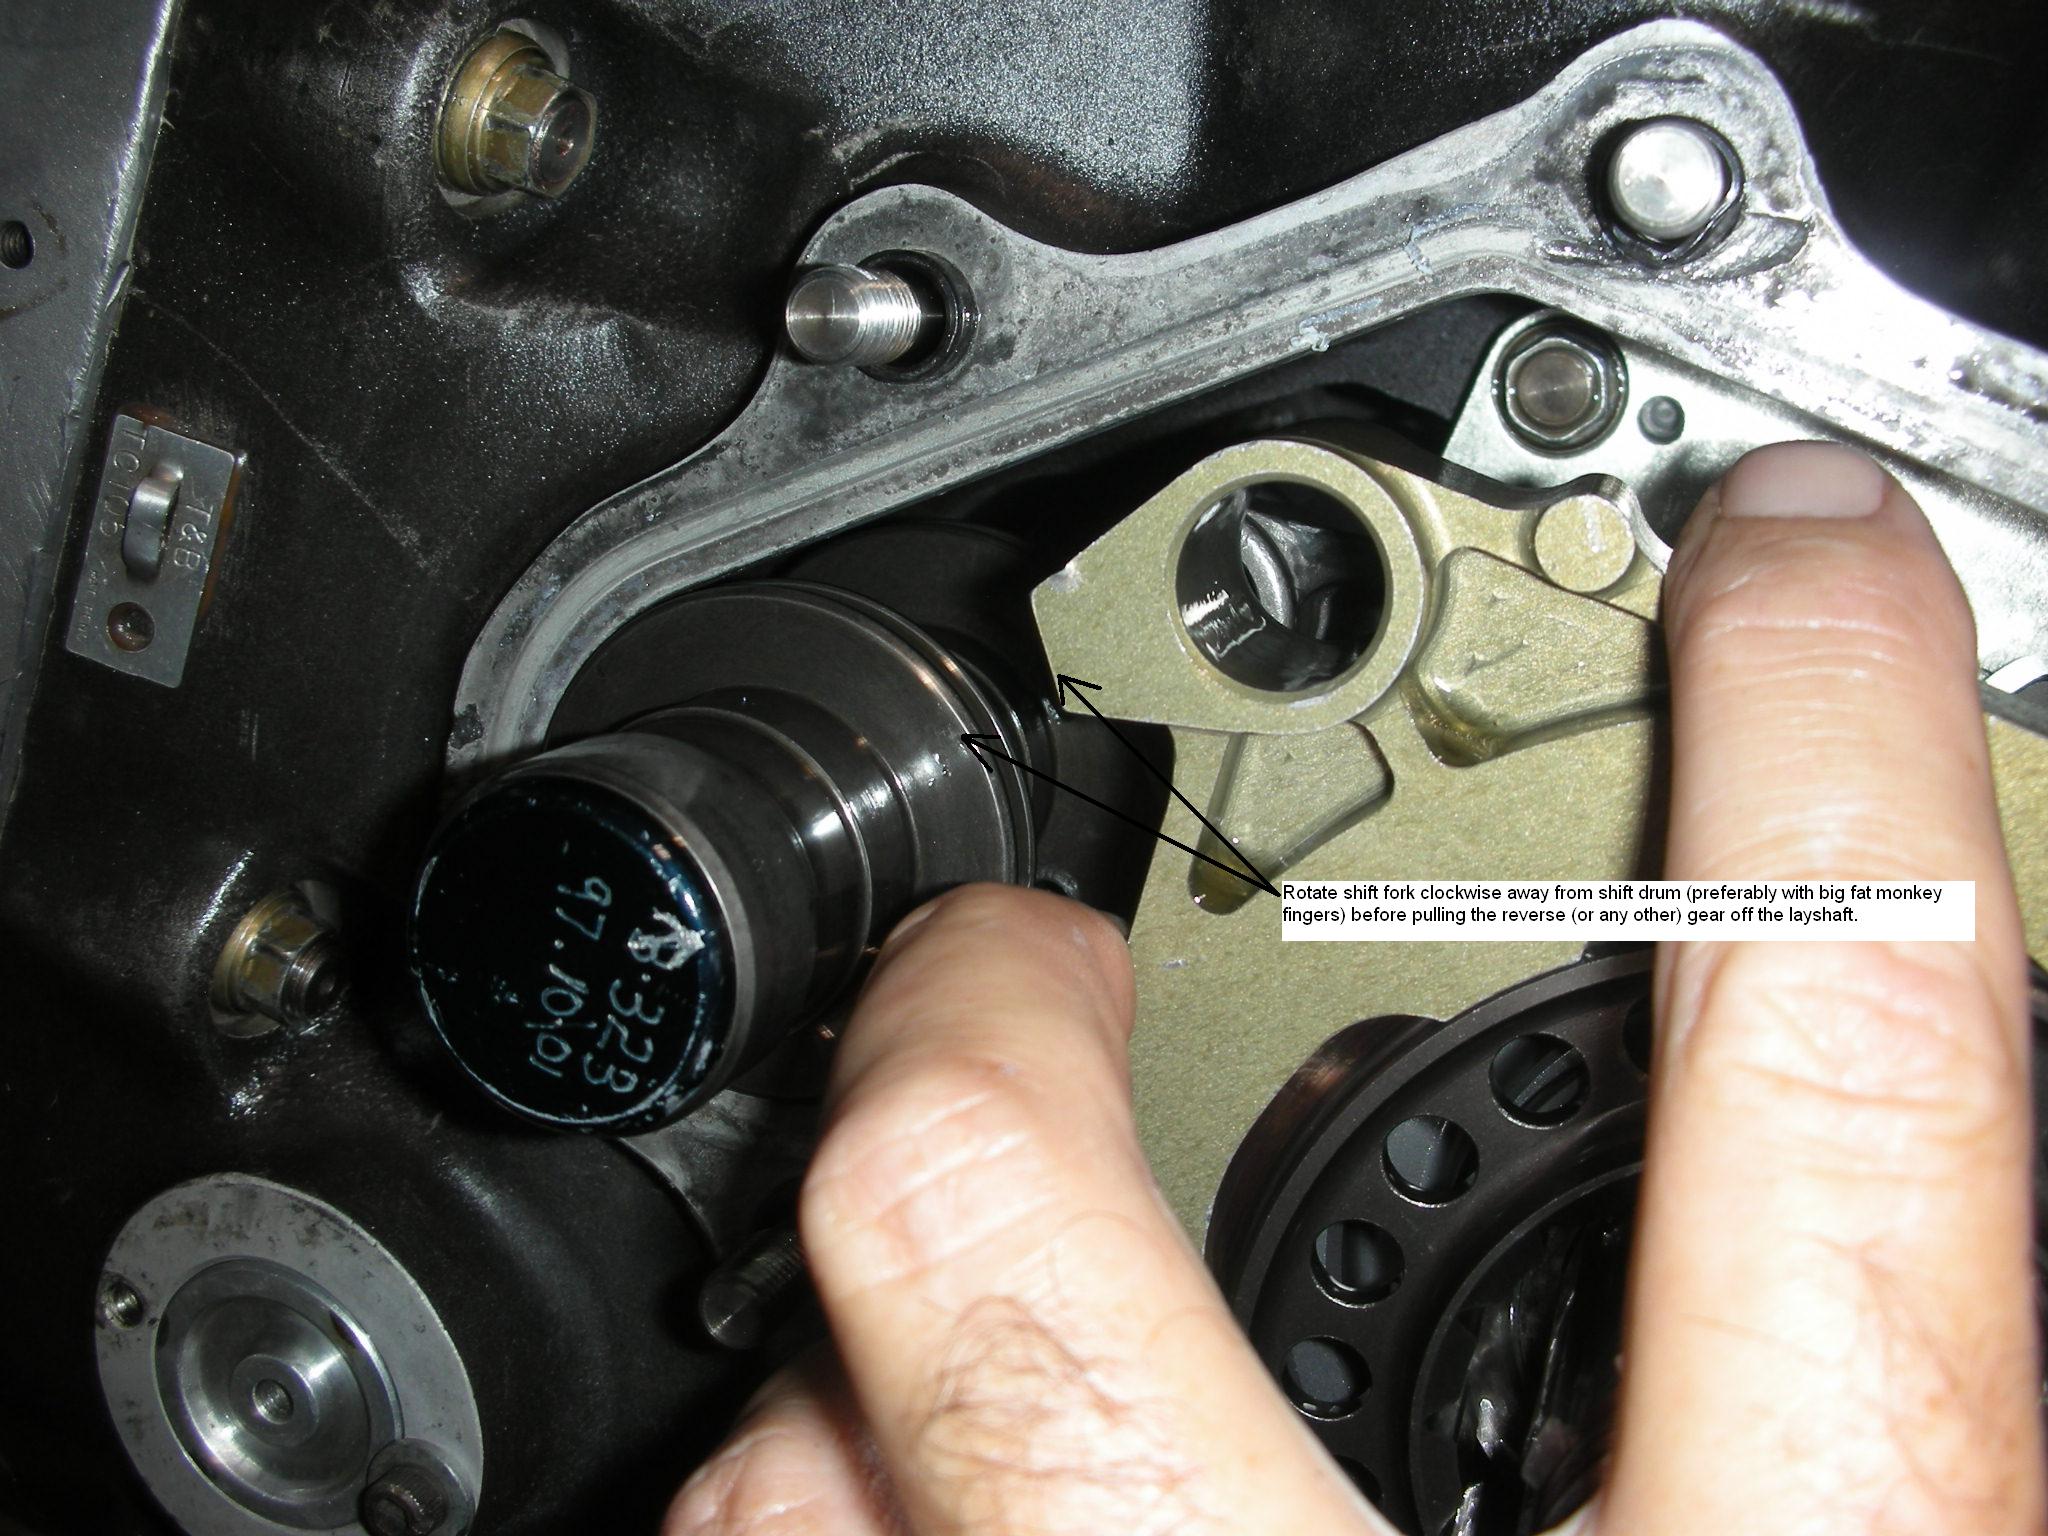
and dog ring. Removing the shift fork pivot rod will allow you to rotate
the shift forks clockwise to disengage the shift fork from the shift barrel so
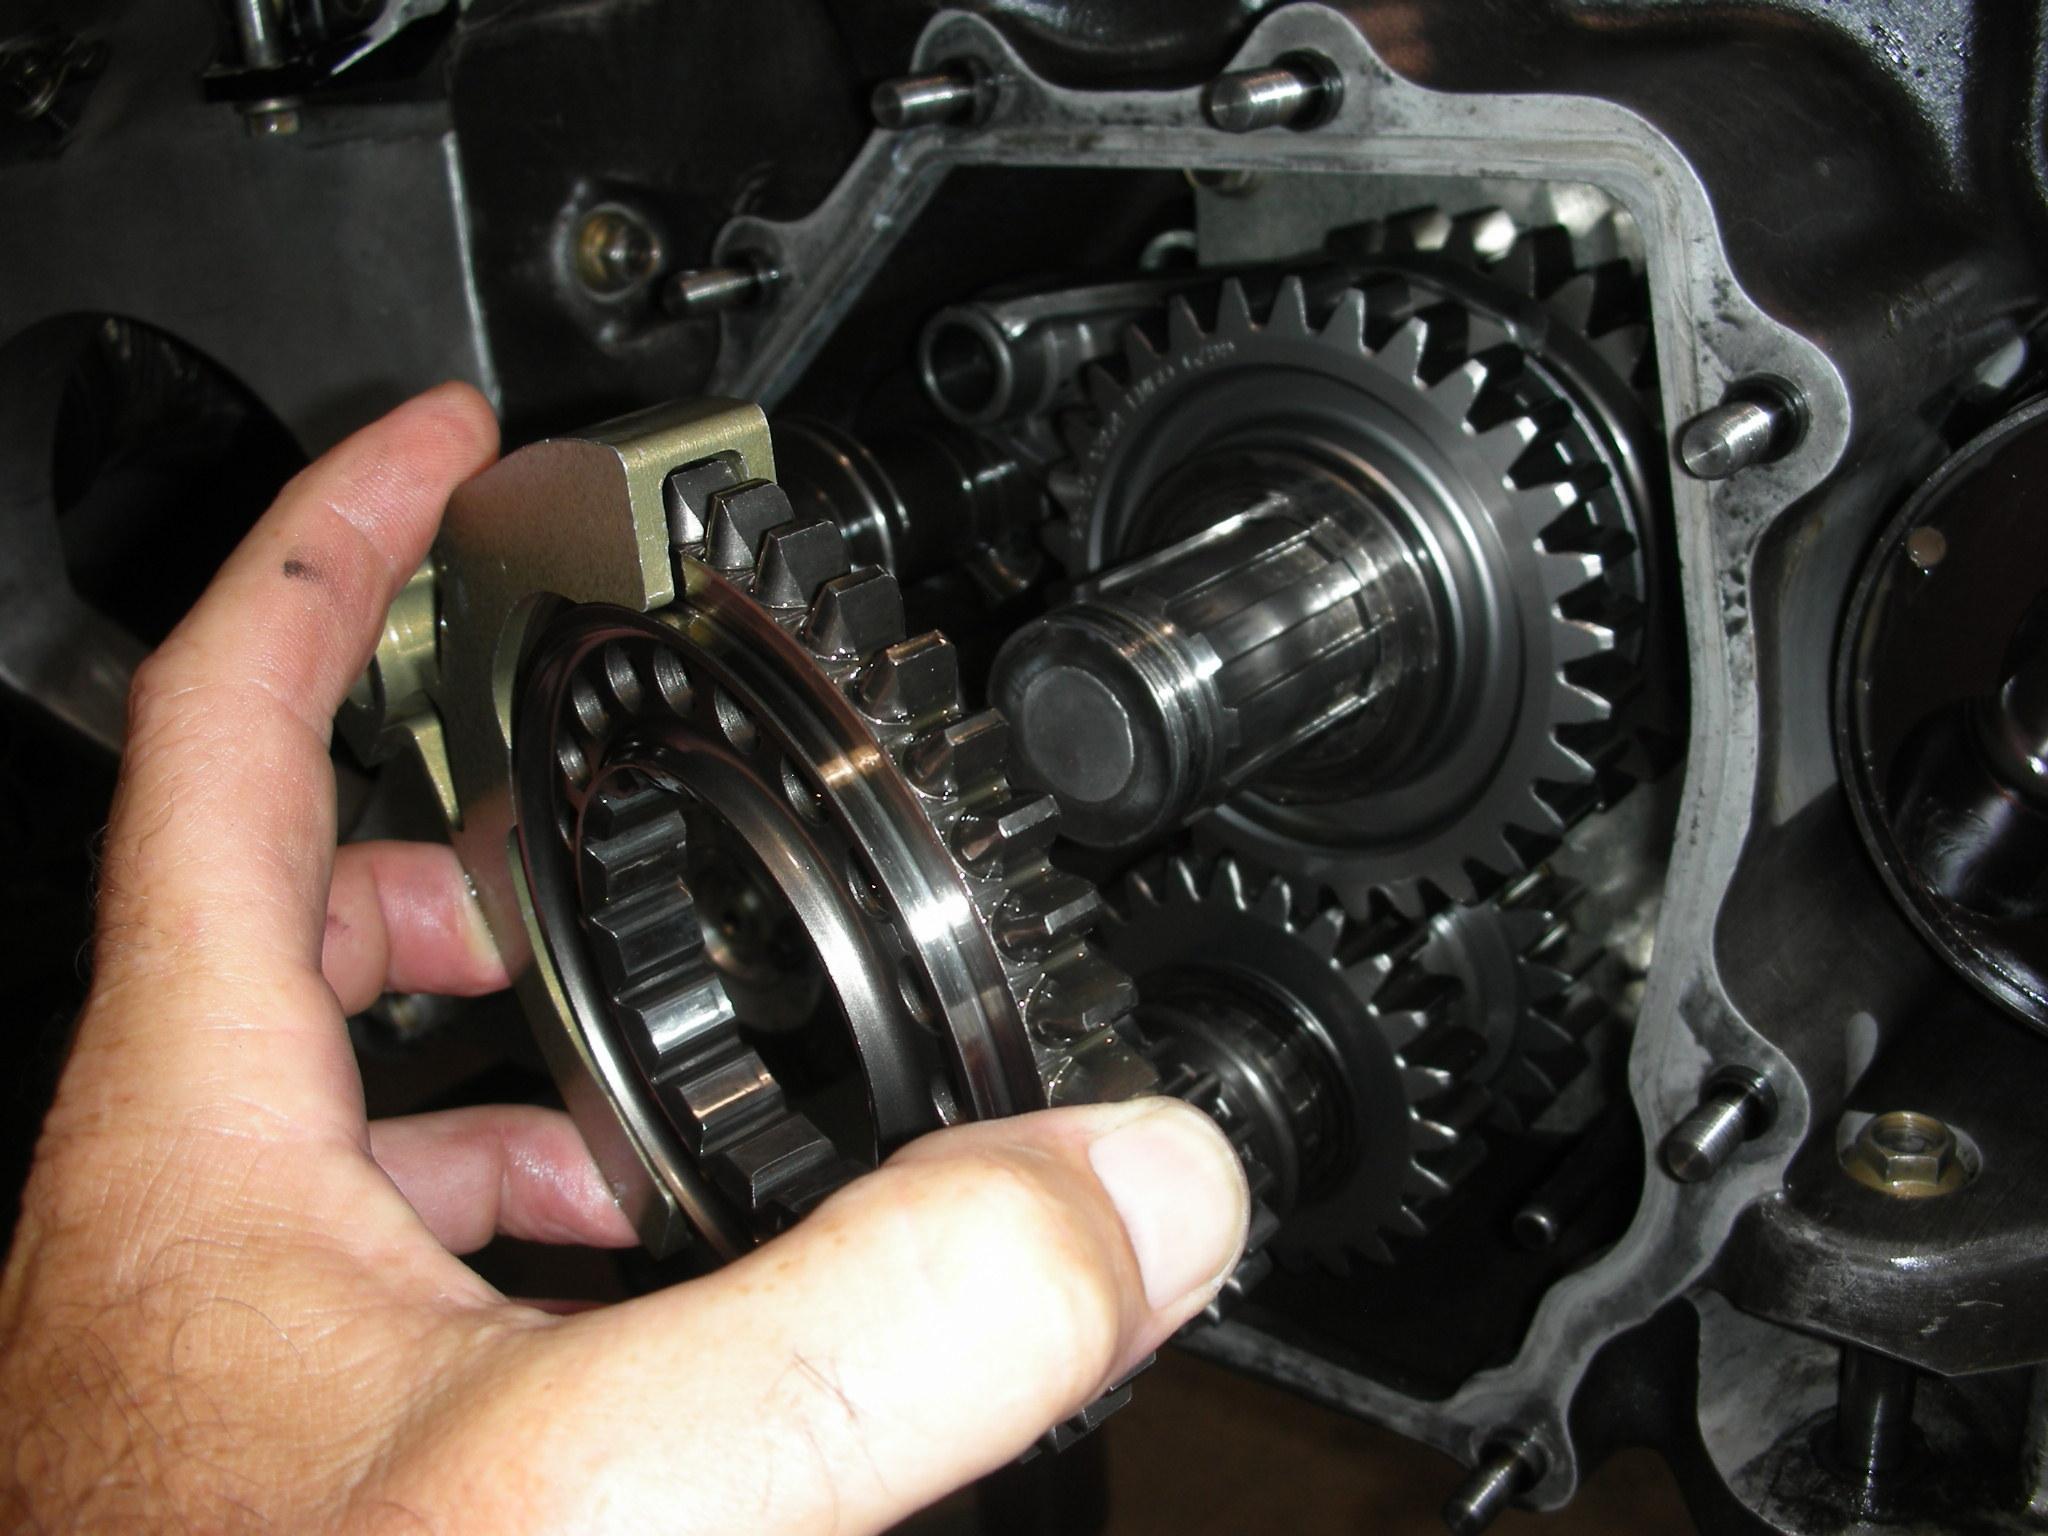
the forks can be removed. Please note the location and direction of each
spacer and bevel washer so they can be put in their proper place upon
reassembly.
First through forth gears are separated from fifth/sixth/reverse by an
intermediate bearing support plate. This plate is needed to support the
center of the cross or layshafts and counter the spreading force generated by
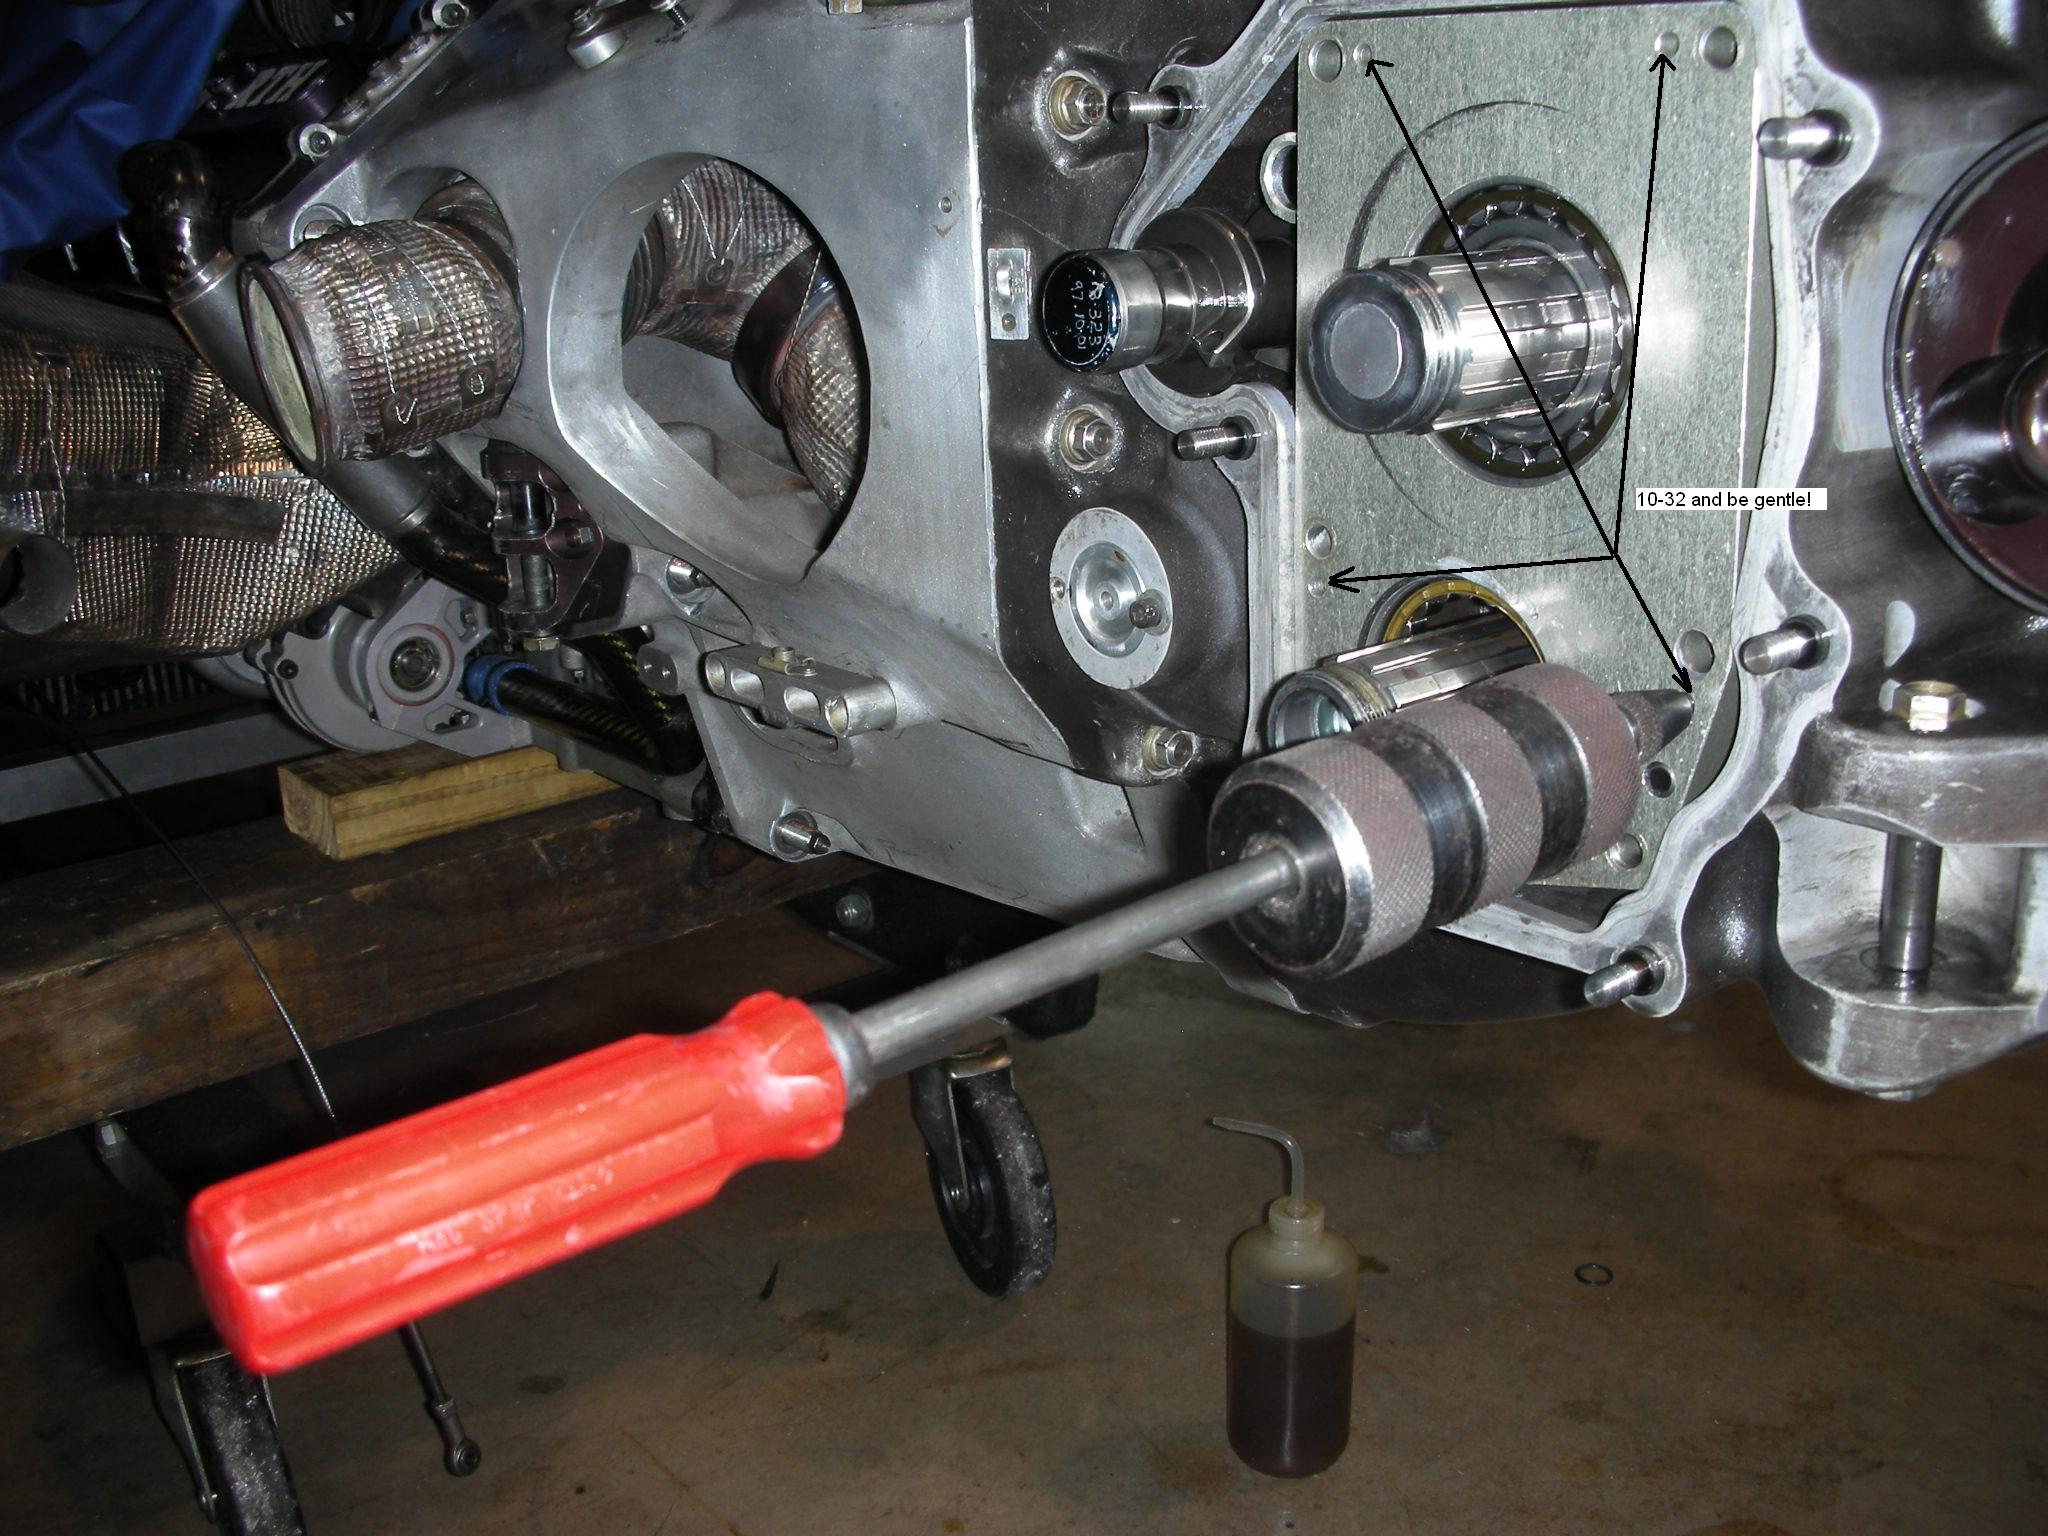
the gears when you start to put torque through the gearbox. You will need
to remove the attachment nuts for this support plate then GENTLY use a small
slide hammer with a 10-32 screw to pull the center support plate out. It
is worth noting that I only get into first through forth gears when I am routine
service on the gearbox. On rare occasions I will change fifth and sixth
like when going to Road America.
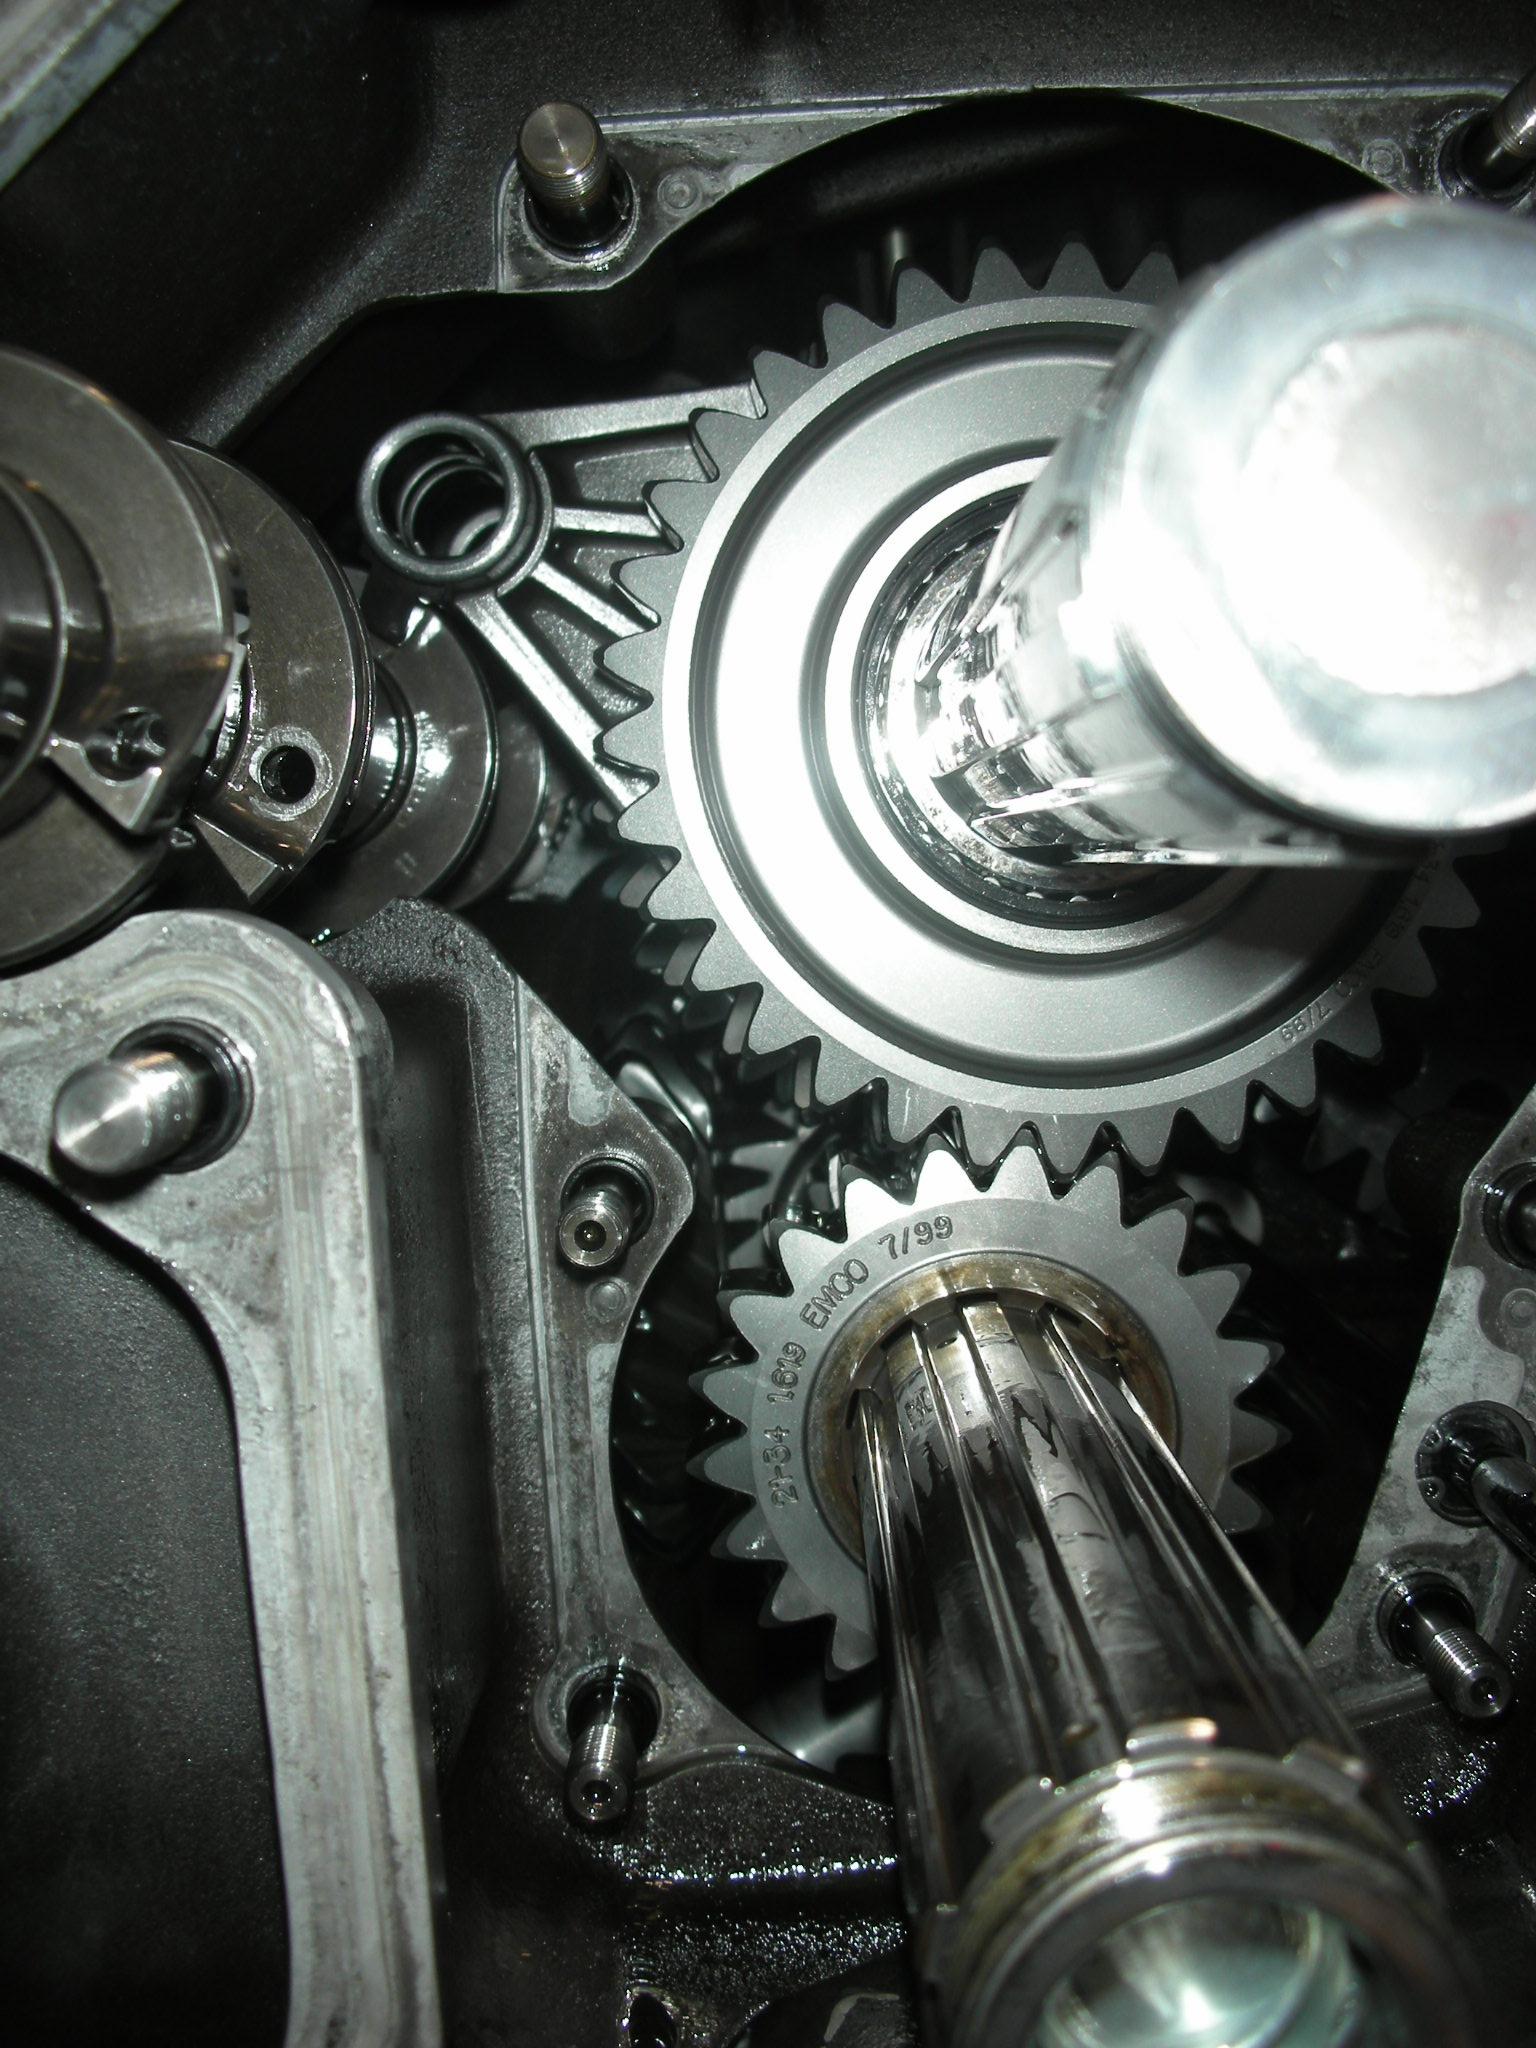
Once the intermediate support plate is removed, you will have access to fist
through forth gears. The driving gears for first and second are built into
the first/second layshaft. Getting the first gear driven gear out of the
box will take a bit of patience as the gear is big and there is not much room.
Once all the gears are removed there will be plenty of room to inspect the bevel
gear and final drive gear sets.